背景
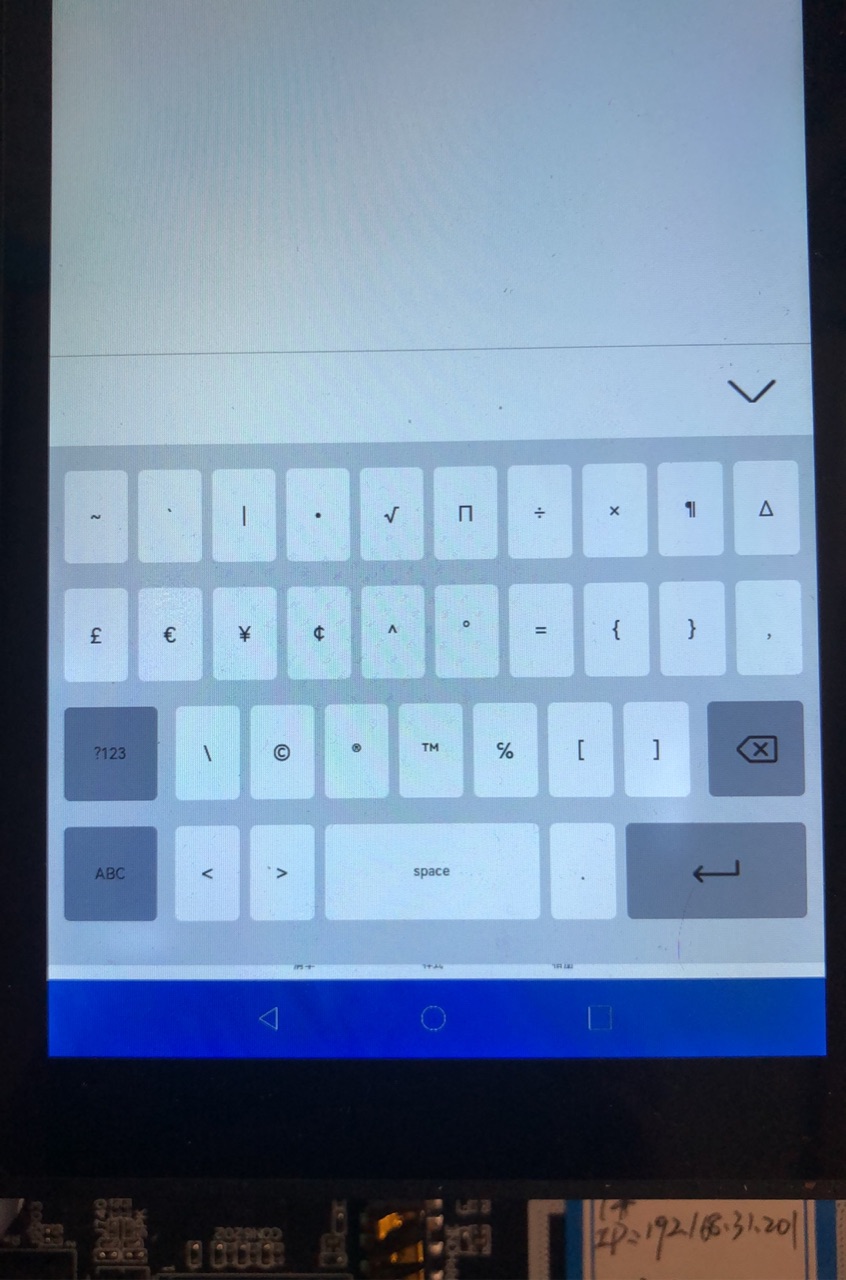
基于RK3568开发板,连接大屏(1920X1200),在使用输入法时出现如下情况:
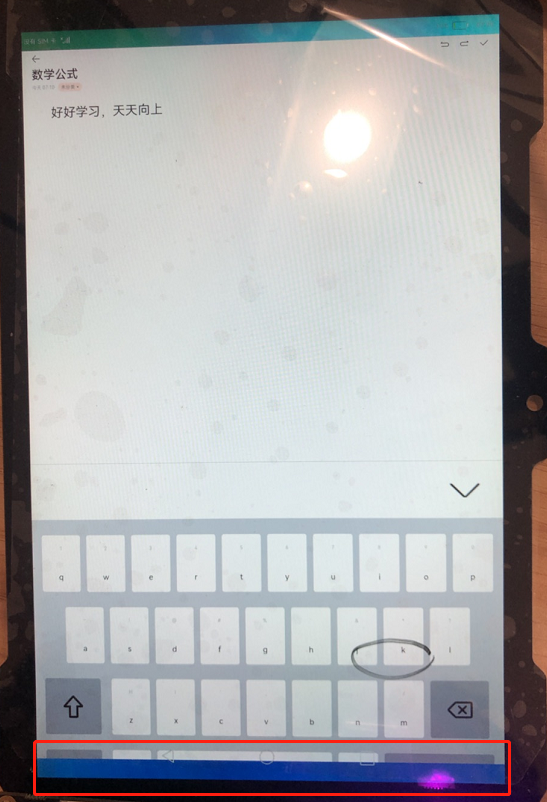
没错,输入法的最后一排安装被虚拟按键栏给遮挡了,这导致输入法无法进行数字字符切换,最大的影响是在分布式ping码认证的时候,因为没办法切换数字按键,无法输入ping码,这样分布式就不能开心的玩了,坑~~~
怎么办?
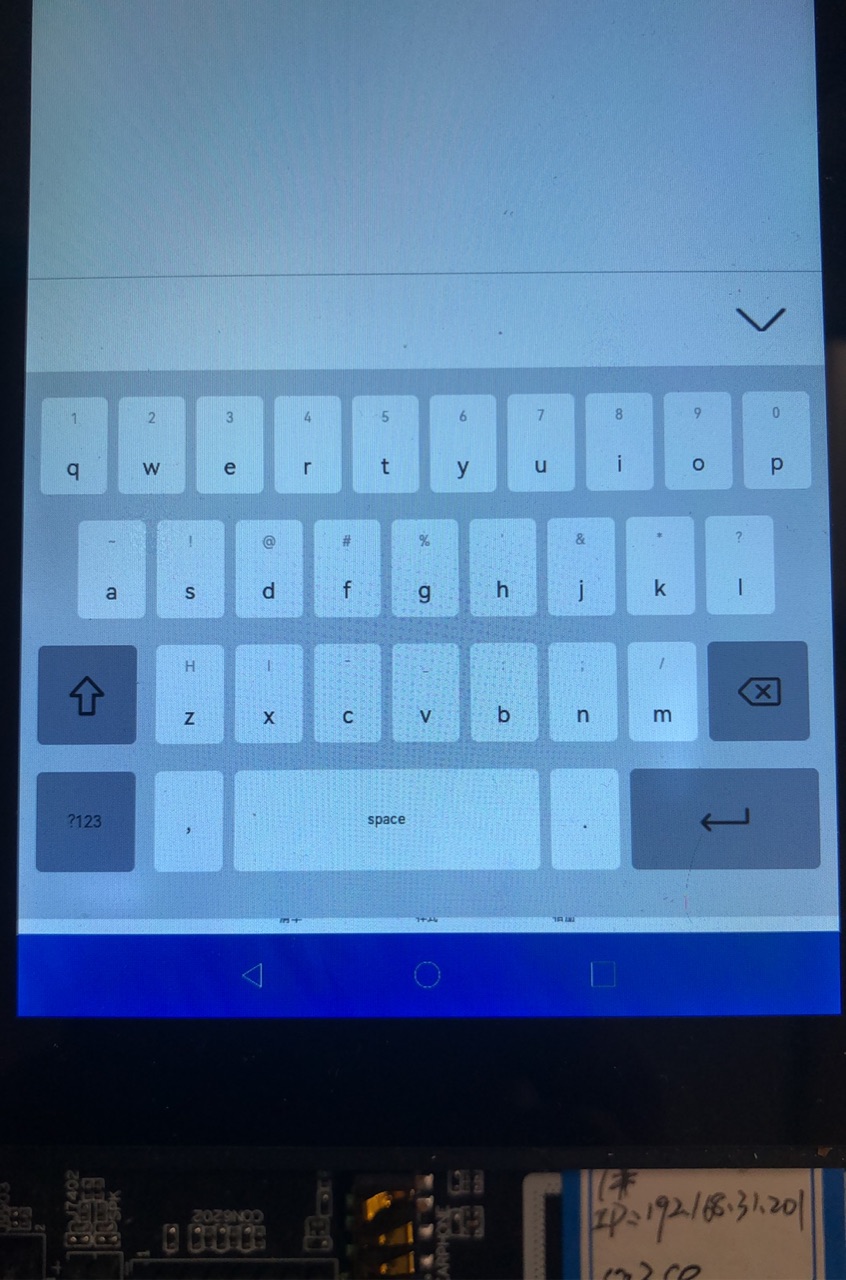
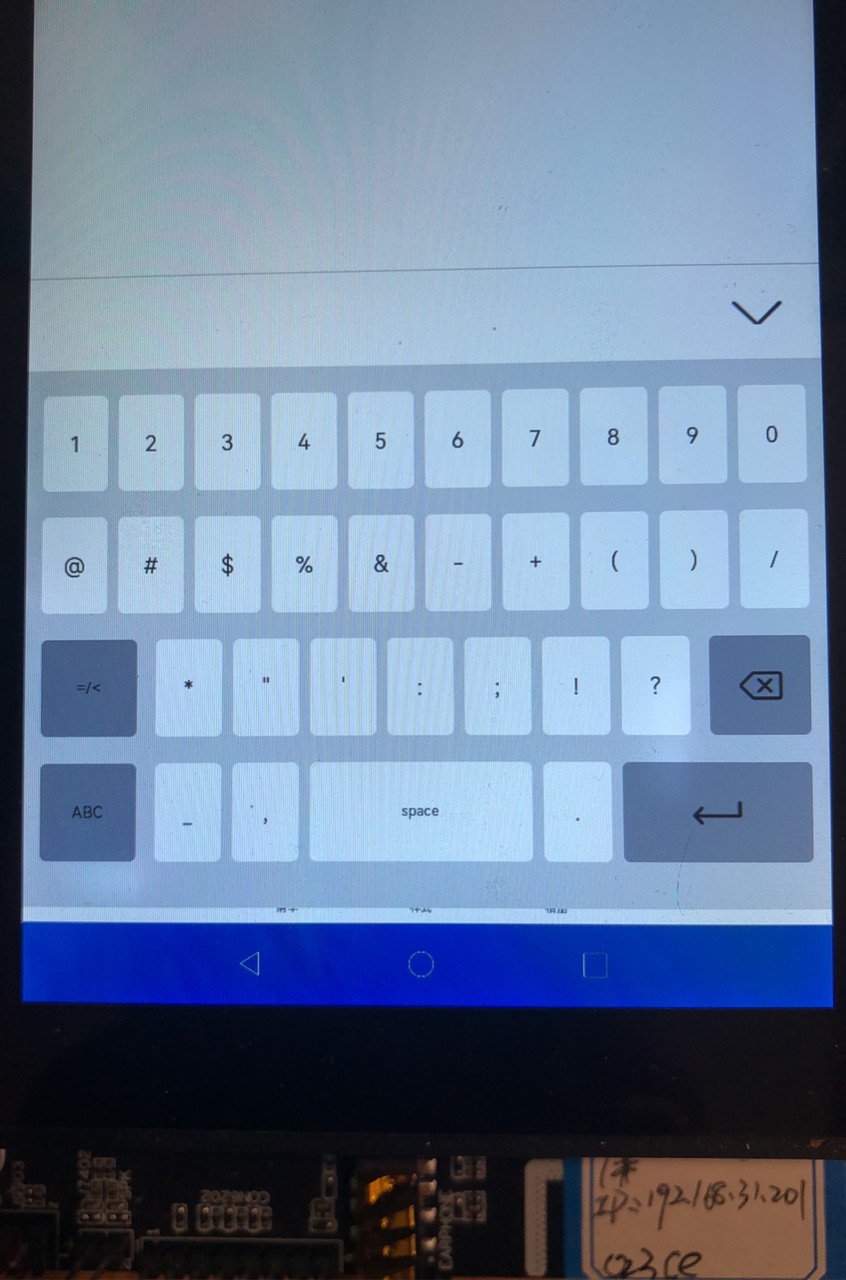
效果
我们先看下修改后的输入法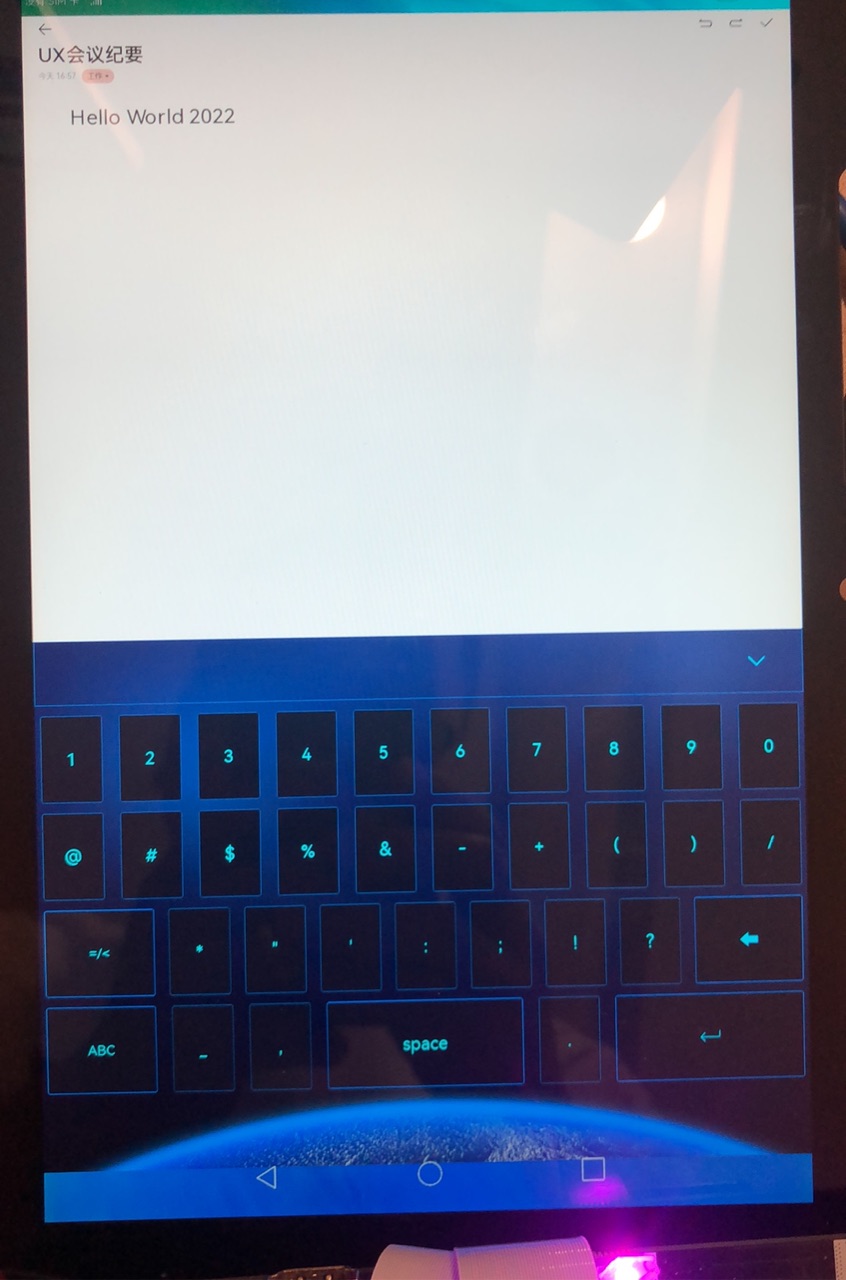
视频地址
实践
首先我们先说明下环境
- 设备:DAYU200【RK3568】+大屏【1920X1200】
- 系统:OpenHarmony 3.2 Beat1
- SDK:9
- IDE:DevEco Studio 3.0 Beta4,Build Version: 3.0.0.992, built on July 14, 2022
先逛下gitter上OpenHarmony 输入法相关的资料
- 多模子系统
- 输入法服务
- 输入法框架
- Input相关API
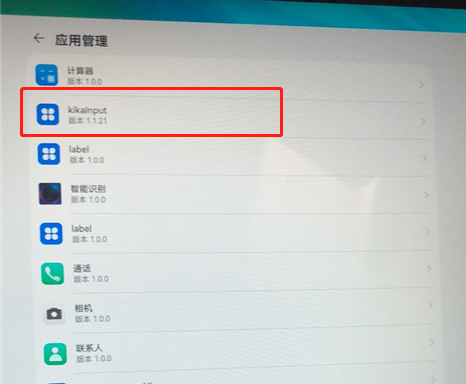
最后在系统设置->应用->应用管理查看下输入法的踪迹:kikaInput
从官方文档中介绍我们知道
样式布局:pages/service/pages/index.ets文件进行布局修改。
业务逻辑:model/KeyboardController.ets文件进行逻辑修改。
从一开始的问题上看应该是布局问题,所以先查看index.ets。以下截取部分代码,有兴趣可以下载官方demo查看。
index.ets
build() {
  Stack() {
    Column() {
      downMenu({toggle: $toggle})
      Column() {
        if (this.menuType === 0) {
          keyMenu({ keyList: this.keyList, menuType: $menuType })
        } else if (this.menuType === 1) {
          numberMenu({ numberList: this.numberList, menuType: $menuType })
        } else {
          symbolMenu({ symbolList: this.symbolList, menuType: $menuType })
        }

      }.width('100%')
      .height(inputStyle.keyboardHeight)
    }.height('100%')
    .margin({ top: '0' })
    .backgroundImage($r('app.media.input_bg3'), ImageRepeat.NoRepeat)
  }
}
布局很简单,就是一个下拉菜单栏,另外一个根据菜单类型显示不同的键盘容器,菜单类型包括:字母、数字、符号。键盘上的布局具体实现可以查看pages/service/pages/index.ets中的接口:
- keyMenu()
- numberMenu()
- symbolMenu()
下面以keyMenu()为例进行说明
struct keyMenu {
  private keyList: keySourceListType[]
  @State public upper: number = 0
  @Link menuType: number

  @Styles pressedStyles() {
    .backgroundColor("#23509c")
  }

  @Styles normalStyles() {
    .backgroundColor("#1a1b32")
  }

  build() {
    Flex({ direction: FlexDirection.Column, alignItems: ItemAlign.Center }) {
      Flex({ justifyContent: FlexAlign.SpaceBetween, alignItems: ItemAlign.Center }) {
        ForEach(this.keyList.slice(0, 10), (item: keySourceListType) => {
          keyItemNumber({ keyValue: item, upper: $upper })
        }, (item: keySourceListType) => item.content)
      }
      .width('100%')
      .height(inputStyle.basicButtonHeight)
      .margin({ top: inputStyle.paddingTop })

      Flex({ justifyContent: FlexAlign.SpaceBetween, alignItems: ItemAlign.Center }) {
        Stack() {
        }.width('4%').height(0)

        ForEach(this.keyList.slice(10, 19), (item: keySourceListType) => {
          keyItemNumber({ keyValue: item, upper: $upper })
        }, (item: keySourceListType) => item.content)
        Stack() {
        }.width('4%').height(0)
      }
      .width('100%')
      .height(inputStyle.basicButtonHeight)
      .margin({ top: inputStyle.paddingTop })

      Flex({ justifyContent: FlexAlign.SpaceBetween, alignItems: ItemAlign.Center }) {
        Stack() {
          Image($rawfile(this.upper === 1 ? 'new_shift_light.svg' : this.upper === 2 ? 'new_shift_light_long.svg' : 'new_shift.svg'))
            .width(inputStyle.featurePicSize)
            .height(inputStyle.featurePicSize)
        }
        .backgroundColor('#1a1b32')
        .borderRadius(4)
        .borderColor('#098bec')
        .borderWidth(1)
        .onClick(() => {
          if (this.upper === 0) {
            this.upper = 1
          } else if (this.upper === 1) {
            this.upper = 2
          } else if (this.upper === 2) {
            this.upper = 0
          }
        })
        .height(inputStyle.basicButtonHeight)
        .width(inputStyle.switchButtonWidth)
        //        .shadow({ radius: 1, color: '#76787c', offsetY: 3 })
        .stateStyles({
          normal: this.normalStyles, pressed: this.pressedStyles
        })

        ForEach(this.keyList.slice(19), (item: keySourceListType) => {
          keyItemNumber({ keyValue: item, upper: $upper })
        }, (item: keySourceListType) => item.content)
        deleteItem()
      }
      .width('100%')
      .height(inputStyle.basicButtonHeight)
      .margin({ top: inputStyle.paddingTop })

      Flex({ justifyContent: FlexAlign.SpaceBetween, alignItems: ItemAlign.Center }) {
        keyItemGray({ keyValue: '?123', menuType: $menuType })
        keyItem({ keyValue: { content: ',', title: ',', upperContent: ',' }, color: '#a8abb7' })
        spaceItem({ spaceWith: inputStyle.spaceButtonWidth_1 })

        keyItem({ keyValue: { content: '.', title: '.', upperContent: '.' }, color: '#a8abb7' })
        returnItem({ returnWidth: inputStyle.returnButtonWidthType_1 })
      }
      .width('100%')
      .height(inputStyle.basicButtonHeight)
      .margin({ top: inputStyle.paddingTop })

    }
    .width('100%')
    .height('100%')
    .padding({
      left: inputStyle.paddingLeftRight,
      right: inputStyle.paddingLeftRight
    })
  }
}
1、字符软键盘包括四行,每一个最外层的容器为:Flex
2、pressedStyles、normalStyles 用于控制虚拟键盘两种状态下的背景颜色:常态、点击态;
3、keyItemNumber 用于控制每个键盘样式,包括按键的背景、文本、字体颜色、尺寸、点击相应事件;
4、切换字符的大小写时通过设置Image内容替换不同标志:Image($rawfile(this.upper === 1 ? 'new_shift_light.svg' : this.upper ===
2 ? 'new_shift_light_long.svg' : 'new_shift.svg'))
5、从设置容器的尺寸上看,全部都在inputStyle中进行设置
let inputStyle: any = styleConfiguration.getInputStyle()StyleConfiguration
export default class StyleConfiguration {
  static getInputStyle() {
    console.info('deviceType:' + deviceType)
    if (deviceType == 'default') {
      return {
        basicButtonWidth: $r("app.float.rk_basic_button_width"),
        basicButtonHeight: $r("app.float.rk_basic_button_height"),
        featurePicSize: $r("app.float.rk_feature_picSize"),
        switchButtonWidth: $r("app.float.rk_switch_button_width"),
        returnPicSize: $r("app.float.rk_return_picSize"),
        returnButtonWidthType_1: $r("app.float.rk_return_button_widthType_1"),
        returnButtonWidthType_2: $r("app.float.rk_return_button_widthType_2"),
        spaceButtonWidth_1: $r("app.float.rk_space_button_width_1"),
        spaceButtonWidth_2: $r("app.float.rk_space_button_width_2"),
        paddingTop: $r("app.float.rk_padding_top"),
        paddingLeftRight: $r("app.float.rk_padding_left_right"),
        downMenuHeight: $r("app.float.rk_downMenu_height"),
        downMenuPicWidth: $r("app.float.rk_downMenu_pic_width"),
        downMenuPicHeight: $r("app.float.rk_downMenu_pic_height"),
        downMenuWidth: $r("app.float.rk_downMenu_width"),
        litterNumberFontSize: $r("app.float.rk_litter_number_fontSize"),
        en_fontSize: $r("app.float.rk_en_fontSize"),
        switchNumberFontSize: $r("app.float.rk_switch_number_fontSize"),
        number1234ontFSize: $r("app.float.rk_number_1234_fontSize"),
        keyboardHeight: $r("app.float.rk_keyboard_height")
      }
    } else {
      if (AppStorage.Get<number>('windowWidth') < AppStorage.Get<number>('windowHeight')) {
        return {
          basicButtonWidth: $r("app.float.s_basic_button_width"),
          basicButtonHeight: $r("app.float.s_basic_button_height"),
          featurePicSize: $r("app.float.s_feature_picSize"),
          switchButtonWidth: $r("app.float.s_switch_button_width"),
          returnPicSize: $r("app.float.return_picSize"),
          returnButtonWidthType_1: $r("app.float.s_return_button_widthType_1"),
          returnButtonWidthType_2: $r("app.float.s_return_button_widthType_2"),
          spaceButtonWidth_1: $r("app.float.s_space_button_width_1"),
          spaceButtonWidth_2: $r("app.float.s_space_button_width_2"),
          paddingTop: $r("app.float.s_padding_top"),
          paddingLeftRight: $r("app.float.s_padding_left_right"),
          downMenuHeight: $r("app.float.downMenu_height"),
          downMenuPicWidth: $r("app.float.downMenu_pic_width"),
          downMenuPicHeight: $r("app.float.downMenu_pic_height"),
          downMenuWidth: $r("app.float.downMenu_width"),
          litterNumberFontSize: $r("app.float.litter_number_fontSize"),
          en_fontSize: $r("app.float.en_fontSize"),
          switchNumberFontSize: $r("app.float.switch_number_fontSize"),
          number1234ontFSize: $r("app.float.number_1234_fontSize"),
          keyboardHeight: $r("app.float.keyboard_height")
        }
      } else {
        return {
          basicButtonWidth: $r("app.float.h_basic_button_width"),
          basicButtonHeight: $r("app.float.h_basic_button_height"),
          featurePicSize: $r("app.float.h_feature_picSize"),
          switchButtonWidth: $r("app.float.h_switch_button_width"),
          returnPicSize: $r("app.float.return_picSize"),
          returnButtonWidthType_1: $r("app.float.h_return_button_widthType_1"),
          returnButtonWidthType_2: $r("app.float.h_return_button_widthType_2"),
          spaceButtonWidth_1: $r("app.float.h_space_button_width_1"),
          spaceButtonWidth_2: $r("app.float.h_space_button_width_2"),
          paddingTop: $r("app.float.h_padding_top"),
          paddingLeftRight: $r("app.float.h_padding_left_right"),
          downMenuHeight: $r("app.float.downMenu_height"),
          downMenuPicWidth: $r("app.float.downMenu_pic_width"),
          downMenuPicHeight: $r("app.float.downMenu_pic_height"),
          downMenuWidth: $r("app.float.downMenu_width"),
          litterNumberFontSize: $r("app.float.litter_number_fontSize"),
          en_fontSize: $r("app.float.en_fontSize"),
          switchNumberFontSize: $r("app.float.switch_number_fontSize"),
          number1234ontFSize: $r("app.float.number_1234_fontSize"),
          keyboardHeight: $r("app.float.keyboard_height")
        }
      }

    }
  }
}
1、设置容器尺寸主要有两种:1、设备类型;2、屏幕宽度、高度(横竖屏?)
2、尺寸的具体数值可以查看resource/base/element/float.json或resource/phone/element/float.json
所以如果想要解决前面提到的问题:软键盘按键被虚拟按键栏遮挡,则可以通过修改每个按键的尺寸达到目的,有没有其他的方式呢?
是的,还有一种方式就是修改软键盘弹窗显示的位置和弹窗的高度,让弹窗的位置显示在虚拟按键之上也可以达到目的,具体怎么实现呢?这我们就需要看逻辑控制类:KeyboardController
KeyboardController
由于代码比较多,下面只截取控制弹窗显示的部分代码
private initWindow(): void {
    this.inputHandle.addLog('initWindow')
    display.getDefaultDisplay().then(dis => {
      this.inputHandle.addLog("initWindow-oncall display");
      var dWidth = dis.width;// 屏幕宽度
      var dHeight = dis.height;// 屏幕高度
      var navigationbar_height = 75;//  导航栏高度
      var keyHeightRate = 0.43;// 软键盘高度系数
      AppStorage.SetOrCreate<number>('windowWidth', dis.width)
      AppStorage.SetOrCreate<number>('windowHeight', dis.height)
      if (dWidth == 1080 && dHeight == 2376) {
        navigationbar_height = 105
        keyHeightRate = 35 / 99
      } else if (dWidth == 2376 && dHeight == 1080) {
        navigationbar_height = 90
        keyHeightRate = 0.68
      }
      var keyHeight = dHeight * keyHeightRate;
      this.barPosition = dHeight - keyHeight - navigationbar_height
      this.nonBarPosition = dHeight - keyHeight
      this.inputHandle.addLog("initWindow-dWidth = " + dWidth + ";dHeight = " + dHeight + ";keyboard height = " + keyHeight + ";navibar height = " + navigationbar_height);

      this.inputHandle.addLog(typeof (this.mContext))
      this.inputHandle.addLog('initWindow-window = ' + typeof (windowManager))
      windowManager.create(this.mContext, this.windowName, this.WINDOW_TYPE_INPUT_METHOD_FLOAT).then((win) => {
        win.setWindowMode(102).then(() => {
          win.resetSize(dWidth, keyHeight).then(() => {
            win.moveTo(0, this.barPosition).then(() => {
              win.loadContent('pages/index').then(() => {
                this.inputHandle.addLog('loadContent finished')
              })
            })
          })
        })
      })
    });
  }
1、import display from '@ohos.display':display,屏幕属性,提供管理显示设备的一些基础能力;
2、默认设置软键盘弹窗的高度系数为:keyHeightRate = 0.43,即弹窗高度等于:屏幕总高的43%;
3、默认导航栏的高度:navigationbar_height = 75,即 75px
4、弹窗显示的位置barPosition = dHeight - keyHeight - navigationbar_height,即弹窗的y轴位置=屏幕高度-软键盘高度-导航栏高度;
5、最后通过win.moveTo(0, this.barPosition)设置完成;
所以如果需要修改弹窗的显示,可以控制弹窗的高度或者显示位置来完成。
编译与安装
编译
如果直接下载官方demo在IDE上使用自动签名方式完成签名后run会提示:Failed due to grant request permissions failed
这个问题是因为应用申请了ohos.permission.GET_BUNDLE_INFO_PRIVILEGED 权限,此权限等级为:system_basic,所以无法安装。
解决方案:OpenHarmony 应用安装报权限错误
安装
卸载
因为有签名问题,所以如果你没有系统签名的话,建议你先卸载
hdc_std shell
>bm install -n com.example.kikakeyboard
安装
安装应用我的做法是通过bm命令执行安装
步骤1、将签名安装包推送到系统/data 目录
hdc_std file send E:\xjs\OH_workspace_gitter\KikaInput\entry\build\default\outputs\default\entry-default-signed.hap /data步骤2、使用bm安装
hdc_std shell
>bm install -p /data/entry-default-signed.hap
看到提示安装成功即可
备注:如果你看到安装成功后,点击输入框没有弹出软键盘,建议你重启设备。
系统应用安装包
输入法系统应用安装包的位置:system/app/com.example.kikakeyboard/kikaInput.hap,你可以将需要替换的安装包修改报名为:kikaInput.hap,覆盖替换系统安装包。
我们指导的弹窗的设置,布局的控制,想要换成自定义的皮肤就非常容易了,你可以下载官方demo试试吧。
问题与思考
1、kikaInput中弹窗的显示位置目前只有三种,默认、屏幕像素1080x2376、2376x1080,最近也看到还有一种屏幕像素2560x1600,都是针对具体屏幕进行的一种适配,比较局限,是否有一些通用的适配方式。
2、软键盘按键的尺寸目前设置也比较局限,希望可以有一些通用的适配方式。
感谢
如果您能看到最后,还希望您能动动手指点个赞,一个人能走多远关键在于与谁同行,我用跨越山海的一路相伴,希望得到您的点赞。
想了解更多关于开源的内容,请访问:
51CTO 开源基础软件社区
https://ost.51cto.com/#bkwz


