svg是目前十分流行的图像文件格式了,svg严格来说应该是一种开放标准的矢量图形语言,使用svg格式我们可以直接用代码来描绘图像,可以用任何文字处理工具打开svg图像,通过改变部分代码来使图像具有交互功能,并可以随时插入到HTML中通过浏览器(如火狐浏览器)来观看。使用svg格式可让你设计激动人心的、高分辨率的Web图形页面。
svg格式具备目前网络流行的jpg和png等格式无法具备的优势:可以任意放大图形显示,但绝不会以牺牲图像质量为代价;可在svg图像中保留可编辑和可搜寻的状态;平均来讲,svg文件比其它格式的图像文件要小很多,因而下载也很快。
我们先来看几张Android上使用SVG的效果图:
从上面的图片看到,如果我们自己来实现这样的特效,非常的麻烦,不过接下来给大家介绍一个开源控件,就可以配合SVG实现这些效果。
首先我们来了解SVG文件的格式,举个例子:
<svg xmlns="http://www.w3.org/2000/svg" id="svg" class="svg" viewBox="0 0 960 480" preserveAspectRatio="xMinYMin meet">
        <path fill="#B4BEC8" stroke="#B4BEC8" stroke-width="2px" stroke-miterlimit="10" d="M570.14 440.2l-29.165-28.99c-7.103-8.5-6.152-36.718-6.02-40.665H425.048c.133 3.947 1.082 32.164-6.018 40.666l-29.166 28.99c-1.237 1.404-1.712 2.505-1.623 3.37h-.054c.76 7.727 6.664 6.332 13.607 6.332H558.01c6.696 0 12.412 1.27 13.493-5.56.58-.953.274-2.282-1.364-4.14z" style="fill-opacity: 1; stroke-opacity: 0; -webkit-transition: fill-opacity 1s ease-in-out, stroke-opacity 1s ease-in-out; transition: fill-opacity 1s ease-in-out, stroke-opacity 1s ease-in-out; stroke-dasharray: 474.095184326172px, 474.095184326172px; stroke-dashoffset: 0px;"></path>        <path fill="#C8D2DC" stroke="#C8D2DC" stroke-width="2px" stroke-miterlimit="10" d="M727.488 355.125c0 8.514-6.597 15.42-14.738 15.42h-465.5c-8.14 0-14.74-6.906-14.74-15.42V45.42c0-8.517 6.6-15.42 14.74-15.42h465.5c8.142 0 14.738 6.903 14.738 15.42v309.705z" style="fill-opacity: 1; stroke-opacity: 0; -webkit-transition: fill-opacity 1s ease-in-out, stroke-opacity 1s ease-in-out; transition: fill-opacity 1s ease-in-out, stroke-opacity 1s ease-in-out; stroke-dasharray: 1645.18310546875px, 1645.18310546875px; stroke-dashoffset: 0px;"></path>
        <path fill="#fff" stroke="#C8D2DC" stroke-width="2px" stroke-miterlimit="10" d="M489.01 343.713c-.042-4.223 3.447-6.254 3.605-6.352-1.963-2.866-5.018-3.263-6.102-3.31-2.602-.26-5.074 1.53-6.39 1.53s-3.356-1.49-5.506-1.448c-2.836.04-5.445 1.645-6.907 4.182-2.942 5.11-.75 12.672 2.116 16.814 1.4 2.02 3.072 4.305 5.268 4.22 2.114-.08 2.913-1.362 5.467-1.362 2.556 0 3.274 1.363 5.51 1.322 2.273-.04 3.716-2.064 5.105-4.098 1.61-2.35 2.273-4.63 2.313-4.748-.05-.02-4.434-1.7-4.48-6.75M484.807 331.31c1.168-1.41 1.953-3.37 1.738-5.327-1.68.068-3.713 1.12-4.916 2.53-1.08 1.247-2.027 3.245-1.77 5.16 1.87.143 3.784-.95 4.947-2.362" style="fill-opacity: 1; stroke-opacity: 0; -webkit-transition: fill-opacity 1s ease-in-out, stroke-opacity 1s ease-in-out; transition: fill-opacity 1s ease-in-out, stroke-opacity 1s ease-in-out; stroke-dasharray: 115.244583129883px, 115.244583129883px; stroke-dashoffset: 0px;"></path>
        <path fill="#3C4650" stroke="#3C4650" stroke-width="2px" stroke-miterlimit="10" d="M727.488 315.527V45.982c0-8.828-6.597-15.982-14.738-15.982h-465.5c-8.14 0-14.74 7.155-14.74 15.982v269.545H727.49z" style="fill-opacity: 1; stroke-opacity: 0; -webkit-transition: fill-opacity 1s ease-in-out, stroke-opacity 1s ease-in-out; transition: fill-opacity 1s ease-in-out, stroke-opacity 1s ease-in-out; stroke-dasharray: 1547.85571289063px, 1547.85571289063px; stroke-dashoffset: 0px;"></path>
        <path fill="#141E28" stroke="#141E28" stroke-width="2px" stroke-miterlimit="10" d="M251.2 48.887h457.205v245.52H251.2z" style="fill-opacity: 1; stroke-opacity: 0; -webkit-transition: fill-opacity 1s ease-in-out, stroke-opacity 1s ease-in-out; transition: fill-opacity 1s ease-in-out, stroke-opacity 1s ease-in-out; stroke-dasharray: 1405.44995117188px, 1405.44995117188px; stroke-dashoffset: 0px;"></path>
      </svg>
上面的代码很复杂,如果说它们是代码的话,但是我们可以注意到,这种书写方式,有点类似于html,都是使用标签
使用最多的标签是path,也就是路径
有的人也会想到,要实现照片上的动态效果,我们可以使用Android自带的绘图类和函数,复杂的曲线路径,我们可以使用path这个类来制定
那会不会SVG里面的path,其实也是这样,那么我们就可以将SVG中的path,对应到android,然后绘制出来就好了。
SVG里面还有各种标签:
包括line直线,circle圆,rect矩形,eliipse椭圆,polygon多边形,等等
这些只要我们又一个SVG文件,都可以将其转换成java代码
作为一个程序员,我们当然不能手动去做这个工作,那就涉及两个问题,一个是SVG的解析,一个是解析后的绘制
幸运的是,已经有人完成了这个工作,并且在Github上开源 https://github.com/geftimov/android-pathview
这篇文章将作为一个简单的例子,来使用上面的开源控件
为了解析SVG,我们需要将一个androidsvg.jar包含进我们的lib
下面我们来看这个控件的简单使用,作为一个自定义控件,我们只需要在布局文件里面添加
<?xml version="1.0" encoding="utf-8"?>
<LinearLayout
xmlns:android="http://schemas.android.com/apk/res/android"
android:orientation="vertical"
android:background="#ff0000"
android:layout_width="fill_parent"
android:layout_height="fill_parent"> <com.example.kaiyicky.myapplication.PathView
xmlns:app="http://schemas.android.com/apk/res-auto"
android:id="@+id/pathView"
android:layout_width="match_parent"
android:layout_height="match_parent"
app:pathColor="@android :color/white"
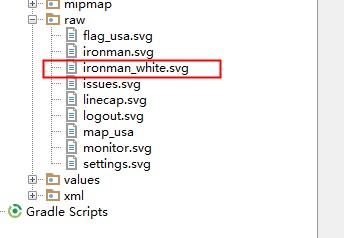
app:svg="@raw/ironman_white"
app:pathWidth="5"/>
</LinearLayout>其实app:svg指定了一个SVG文件,我们可以把这个文章放在raw目录下面
然后来看Activity里面:
public class MainActivity extends FragmentActivity {

    @Override
    protected void onCreate(Bundle savedInstanceState) {
        super.onCreate(savedInstanceState);
        setContentView(R.layout.activity_main);        final PathView pathView = (PathView) findViewById(R.id.pathView);
//        final Path path = makeConvexArrow(50, 100);
//        pathView.setPath(path);
        pathView.setFillAfter(true);
        pathView.useNaturalColors();
        pathView.setOnClickListener(new View.OnClickListener() {
            @Override
            public void onClick(View v) {
                pathView.getPathAnimator().
                        delay(100).
                        duration(1500).
                        interpolator(new AccelerateDecelerateInterpolator()).
                        start();
            }
        });
    }    private Path makeConvexArrow(float length, float height) {
        final Path path = new Path();
        path.moveTo(0.0f, 0.0f);
        path.lineTo(length / 4f, 0.0f);
        path.lineTo(length, height / 2.0f);
        path.lineTo(length / 4f, height);
        path.lineTo(0.0f, height);
        path.lineTo(length * 3f / 4f, height / 2f);
        path.lineTo(0.0f, 0.0f);
        path.close();
        return path;
    }}
看到注释的部分,调用了makeConvexArraw()方法,如果我们没有在xml文件里面指定svg文件,我们也可以在代码中手动指定绘制的路径
让代码跑起来,点击屏幕,于是就实现了以下效果:

就是这么简单,至于这么制作SVG文件,大家可以找美工帮忙,使用ps和ai,可以将图片转换成SVG
源码下载地址:
百度网盘下载: http://pan.baidu.com/s/1pJ9pmnL
------------------------------------------分割线------------------------------------------
免费下载地址在 http://linux.linuxidc.com/
用户名与密码都是www.linuxidc.com
具体下载目录在 /2015年资料/8月/20日/Android实现炫酷SVG动画效果/
下载方法见 http://www.linuxidc.com/Linux/2013-07/87684.htm
另一个github https://github.com/latemic/svg-android


