接上一篇《8.手写rpc框架-代码实现(上)》
上一篇我们编写了框架层的rpc-framework父级工程以及rpc-common公共(编码解码)工具类工程。本篇我们继续来编写rpc-client工程。
(作者:黄勇)
对于rpc-client工程我们要实现的是,使用Netty封装一个客户端网络层(RpcClient),以及rpc的服务动态代理(RpcProxy),即用来进行远程服务类加载和方法调用的代理类。
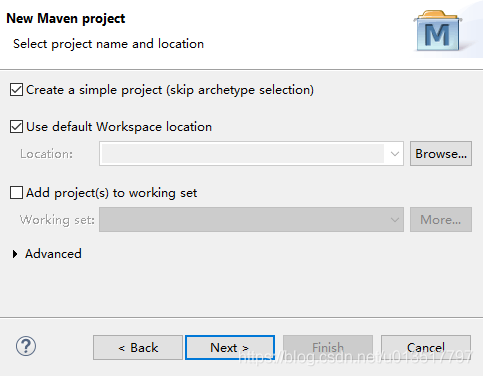
在MyEclipse新建名为rpc-client的maven工程:

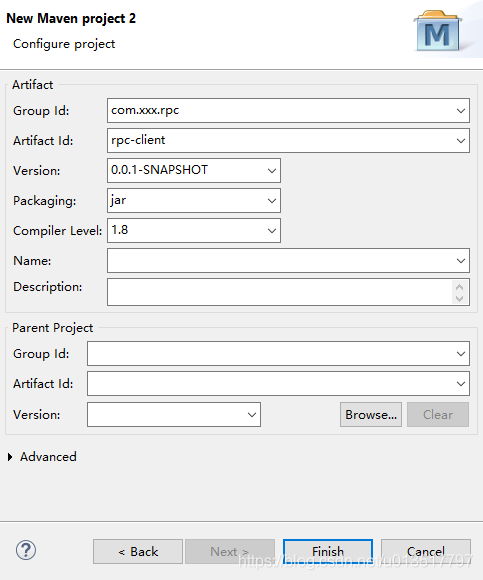
新建成功之后,因为我们需要rpc-common工程进行编码解码,然后还需要注入即将要编写的rpc-registry注册中心模块(这里是zookeeper)。我们引入以下依赖:
<?xml version="1.0" encoding="UTF-8"?>
<project xmlns="http://maven.apache.org/POM/4.0.0"
         xmlns:xsi="http://www.w3.org/2001/XMLSchema-instance"
         xsi:schemaLocation="http://maven.apache.org/POM/4.0.0
         http://maven.apache.org/xsd/maven-4.0.0.xsd">

    <modelVersion>4.0.0</modelVersion>

    <parent>
      <groupId>com.xxx.rpc</groupId>
      <artifactId>rpc-framework</artifactId>
      <version>0.0.1-SNAPSHOT</version>
    </parent>

    <artifactId>rpc-client</artifactId>

    <dependencies>
        <!-- RPC Common -->
        <dependency>
            <groupId>com.xxx.rpc</groupId>
            <artifactId>rpc-common</artifactId>
            <version>${project.version}</version>
        </dependency>
        <!-- RPC Registry with ZooKeeper -->
        <!-- <dependency>
            <groupId>com.xxx.rpc</groupId>
            <artifactId>rpc-registry-zookeeper</artifactId>
            <version>${project.version}</version>
        </dependency> -->
    </dependencies>

</project>
因为我们这里还没有编写rpc-registry-zookeeper,所以可以暂时将其注释。
然后我们开始编写代码,首先在src/main/java中创建com.xxx.rpc.client包下的RpcClient和RpcProxy类,其中RpcClient是利用Netty进行tcp请求发送的类,RpcProxy是封装rpc信息,并调用RpcClient客户端对象,将rpc请求信息发送至服务地址对应的服务器中。
首先是RpcClient客户端:
package com.xxx.rpc.client;

import org.slf4j.Logger;
import org.slf4j.LoggerFactory;

import com.xxx.rpc.common.bean.RpcRequest;
import com.xxx.rpc.common.bean.RpcResponse;
import com.xxx.rpc.common.codec.RpcDecoder;
import com.xxx.rpc.common.codec.RpcEncoder;

import io.netty.bootstrap.Bootstrap;
import io.netty.channel.Channel;
import io.netty.channel.ChannelFuture;
import io.netty.channel.ChannelHandlerContext;
import io.netty.channel.ChannelInitializer;
import io.netty.channel.ChannelOption;
import io.netty.channel.ChannelPipeline;
import io.netty.channel.EventLoopGroup;
import io.netty.channel.SimpleChannelInboundHandler;
import io.netty.channel.nio.NioEventLoopGroup;
import io.netty.channel.socket.SocketChannel;
import io.netty.channel.socket.nio.NioSocketChannel;

//RPC 客户端,用于发送rpc请求
//继承SimpleChannelInboundHandler,将自己作为一个InboundHandler
public class RpcClient extends SimpleChannelInboundHandler<RpcResponse>{
    //日志对象
    private static final Logger LOGGER = LoggerFactory.getLogger(RpcClient.class);
    //传输信息的服务端的ip和端口
    private final String host;
    private final int port;
    //服务端反馈的response信息对象
    private RpcResponse response;
    //构造方法,用于传输服务端的信息
    public RpcClient(String host,int port){
        this.host = host;
        this.port = port;
    }

    //处理管道读取反馈的response对象,这里只需获取response对象即可。
    @Override
    protected void channelRead0(ChannelHandlerContext arg0, RpcResponse arg1) throws Exception {
        this.response = response;
    }

    //异常处理
    @Override
    public void exceptionCaught(ChannelHandlerContext ctx, Throwable cause) throws Exception {
        LOGGER.error("api caught exception",cause);//日志记录异常原因
        ctx.close();//关闭上下文对象
    }

    //使用Netty发送rpc请求
    public RpcResponse send(RpcRequest request) throws Exception{
        EventLoopGroup group = new NioEventLoopGroup();

        try {
            //创建并初始化Netty客户端Bootstrap对象
            Bootstrap bootstrap = new Bootstrap();
            bootstrap.group(group);
            bootstrap.channel(NioSocketChannel.class);
            bootstrap.handler(new ChannelInitializer<SocketChannel>(){

                @Override
                protected void initChannel(SocketChannel channel) throws Exception {
                    ChannelPipeline pipeline = channel.pipeline();
                    pipeline.addLast(new RpcEncoder(RpcRequest.class));//注册编码器
                    pipeline.addLast(new RpcDecoder(RpcResponse.class));//注册解码器
                    pipeline.addLast(RpcClient.this);//注册客户端处理对象
                }
            });
            //设置无延迟操作
            bootstrap.option(ChannelOption.TCP_NODELAY, true);
            //连接RPC服务器
            ChannelFuture future = bootstrap.connect(host, port).sync();
            //写入RPC请求数据并关闭连接
            Channel channel = future.channel();
            channel.writeAndFlush(request).sync();
            channel.closeFuture().sync();
            return response;
        }finally{
            group.shutdownGracefully();
        }
    }
}
这里RpcClient继承了SimpleChannelInboundHandler,将自己作为一个InboundHandler,类的成员变量有LOGGER日志对象、服务端的ip和端口,服务端反馈的response信息对象。然后在构造方法中传入传输服务端的信息(ip/端口),然后在重写channelRead0和exceptionCaught进行反馈信息接收和异常处理。最后编写核心方法----send,该方法初始化了Netty客户端的Bootstrap对象,设置了事件队列EventLoopGroup、通道类型,处理器handler中,分别在管道处理器链上注册了编码器RpcEncoder、解码器RpcDecoder和客户端处理对象RpcClient本身,最后连接主机,发送请求对象并获取反馈对象,作为方法的返回值。然后是RpcProxy类:
package com.xxx.rpc.client;

import java.lang.reflect.InvocationHandler;
import java.lang.reflect.Method;
import java.lang.reflect.Proxy;
import java.util.UUID;

import org.apache.commons.lang3.StringUtils;
import org.slf4j.Logger;
import org.slf4j.LoggerFactory;

import com.xxx.rpc.common.bean.RpcRequest;
import com.xxx.rpc.common.bean.RpcResponse;
import com.xxx.rpc.common.utils.StringUtil;

//RPC 代理,用于创建 RPC 服务代理
//使用Netty客户端发送rpc请求,并获取反馈信息,拿到相关的服务调用类的相关方法调用结果
public class RpcProxy {
    //日志对象
    private static final Logger LOGGER = LoggerFactory.getLogger(RpcProxy.class);
    //服务地址
    private String serviceAddress;
    //服务地址发现类,该类由注册中心实现
    private ServiceDiscovery serviceDiscovery;
    //当不需要注册中心时,直接传入服务地址即可
    public RpcProxy(String serviceAddress) {
        this.serviceAddress = serviceAddress;
    }
    //当需要注册中心时,传入注册中心的服务地址发现类对象
    public RpcProxy(ServiceDiscovery serviceDiscovery) {
        this.serviceDiscovery = serviceDiscovery;
    }

    //创建类方法
    @SuppressWarnings("unchecked")
    public <T> T create(final Class<?> interfaceClass) {
        return create(interfaceClass, "");
    }

    //创建类方法,带有服务版本参数
    @SuppressWarnings("unchecked")
    public <T> T create(final Class<?> interfaceClass, final String serviceVersion) {
        //创建动态代理对象
        return (T) Proxy.newProxyInstance(
                interfaceClass.getClassLoader(), //类加载器
                new Class<?>[]{interfaceClass}, //代理类的类型
                new InvocationHandler(){//代理的处理类
                    //具体的代理方法
                    @Override
                    public Object invoke(Object proxy, Method method, Object[] args) throws Throwable {
                         // 创建 RPC 请求对象并设置请求属性
                        RpcRequest request = new RpcRequest();
                        request.setRequestId(UUID.randomUUID().toString());//唯一的请求ID
                        request.setInterfaceName(method.getDeclaringClass().getName());//要调用的方法名
                        request.setServiceVersion(serviceVersion);//服务版本
                        request.setMethodName(method.getName());//要调用的方法名称
                        request.setParamterTypes(method.getParameterTypes());//设置调用方法的参数类型
                        request.setParameters(args);//设置调用方法的参数
                        //获取RPC服务地址
                        if(serviceDiscovery!=null){
                            //当serviceDiscovery对象不为空时,说明需要从注册中心获取服务地址
                            String serviceName = interfaceClass.getName();
                            if (StringUtil.isNotEmpty(serviceVersion)) {
                                serviceName += "-" + serviceVersion;//服务名称加版本号
                            }
                            serviceAddress = serviceDiscovery.discover(serviceName);//远程获取服务地址
                            LOGGER.debug("discover service: {} => {}", serviceName, serviceAddress);
                        }
                        //如果服务地址为空,就报错
                        if (StringUtil.isEmpty(serviceAddress)) {
                            throw new RuntimeException("server address is empty");
                        }
                        // 从 RPC 服务地址中解析主机名与端口号
                        String[] array = StringUtils.split(serviceAddress,":");
                        String host = array[0];
                        int port = Integer.parseInt(array[1]);
                        // 创建 RPC 客户端对象并发送 RPC 请求
                        RpcClient client = new RpcClient(host, port);
                        long time = System.currentTimeMillis();
                        RpcResponse response = client.send(request);//获取rpc请求的反馈对象
                        LOGGER.debug("time: {}ms", System.currentTimeMillis() - time);//日志打印请求处理时间
                        if(response==null){//如果反馈对象为空,则报错
                            throw new RuntimeException("response is null");
                        }
                        // 返回 RPC 响应结果
                        if (response.hasException()) {//是否有异常
                            throw response.getException();//反馈的异常对象
                        } else {
                            return response.getResult();//调用远程方法返回的具体对象
                        }
                    }
                });
    }

    //注册中心服务发现对象,还没有实现,这里先放一个空的
    class ServiceDiscovery{

        public String discover(String serviceName) {
            // TODO Auto-generated method stub
            return null;
        }

    }
}
该类的核心就是,利用create方法中传递的类的类型信息,创建代理对象,替用户获取这个类的实现类,调用相关方法,并获取方法调用返回的具体对象。
这里要注意的是ServiceDiscovery是需要在注册中心工程rpc-registry-zookeeper中实现的,但是这里因为还没有开始写rpc-registry-zookeeper工程,所以在下面先放置了一个空对象。
至此,rpc-client工程编写完成,下一篇我们来编写服务端工程rpc-server,根据客户端发送的方法调用请求,调用相关方法并反馈方法返回的对象。


