netty介绍
这是netty的官方介绍,大概意思就是:
我们经常希望我们的应用能够和其它应用互相通信。例如,我们经常使用http请求去查询信息或者使用rpc调用webservice,但是对于这种特定的协议(http,ftp等)来说,是不易于专门针对
自己应用程序进行扩展的。比方说我们不会使用http协议去传输大文件,邮件,即时通讯(金融信息),这需要对现有协议做出较大的优化!这样我们就可以使用netty定制属于你自己的协议!
为什么要学netty?
这里借用知乎上一个回答:
  while ture
      events = takeEvents(fds)  // 获取事件,如果没有事件,线程就休眠
      for event in events {
          if event.isAcceptable {
              doAccept() // 新链接来了
          } elif event.isReadable {
              request = doRead() // 读消息
              if request.isComplete() {
                  doProcess()
              }
          } elif event.isWriteable {
              doWrite()  // 写消息
          }
      }
 }
总结:程序员水平进阶的利器!
实践
note: 对于本例中除了非常重要的核心类会讲解外,其他类不会过多讲解,本章只做入门,其它章节会重点讲解!
我们已经知道了netty的作用(灵活优化定制你自己的协议),以及为什么要学习netty。那接下来我们就一步一步来定制自己的协议最后完成聊天室!
print协议
既然我们取名print协议,那就是打印的意思:服务端接受客服端的信息并且打印!
首先我们编写一个ChannelInboundHandlerAdapter,用于处理接收到的消息,我们首先分析下这个类的作用,继承关系如下:
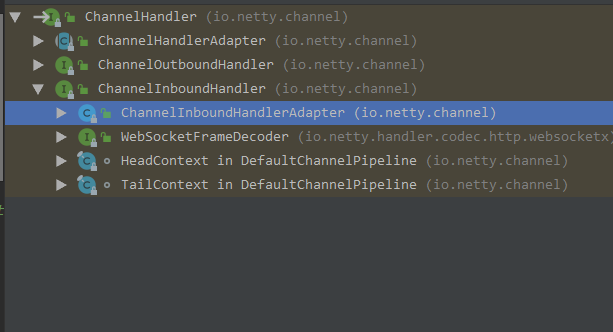
它的作用简单概括就是:用于处理 I/O事件的处理器,所以本例我们自然是用它来处理消息,于是乎有了如下类:PrintServerHandler:
public class EchoServerHandler extends ChannelInboundHandlerAdapter {

    @Override
    public void channelRead(ChannelHandlerContext ctx, Object msg) { // (2)
        ByteBuf byteBuf = (ByteBuf) msg;
        System.out.println(byteBuf.toString(Charset.forName("utf-8")));
        ctx.writeAndFlush(msg);
    }

    @Override
    public void exceptionCaught(ChannelHandlerContext ctx, Throwable cause) { // (4)
        // Close the connection when an exception is raised.
        cause.printStackTrace();
        ctx.close();
    }
}
收到消息后打印,接着继续编写一个启动类,用于启动一个开启我们自己协议的服务,PrintServerApp:
public class EchoServerApp {
    private int port;

    public EchoServerApp(int port) {
        this.port = port;
    }

    public void run() throws Exception {
        NioEventLoopGroup bossLoopGroup = new NioEventLoopGroup();
        NioEventLoopGroup workLoopGroup = new NioEventLoopGroup();

        try {
            ServerBootstrap serverBootstrap = new ServerBootstrap();
            serverBootstrap.group(bossLoopGroup, workLoopGroup)
                    .channel(NioServerSocketChannel.class)
                    .childHandler(new ChannelInitializer<SocketChannel>() {
                        @Override
                        protected void initChannel(SocketChannel ch) throws Exception {
                            ch.pipeline().addLast(new EchoServerHandler());
                        }
                    })
                    .option(ChannelOption.SO_BACKLOG, 128)
                    .childOption(ChannelOption.SO_KEEPALIVE, true);

            ChannelFuture channelFuture = serverBootstrap.bind(port).sync();

            channelFuture.channel().closeFuture().sync();
        } finally {
            bossLoopGroup.shutdownGracefully();
            workLoopGroup.shutdownGracefully();
        }
    }

    public static void main(String[] args) throws Exception {
        new EchoServerApp(8080).run();
    }
}
启动。然后我们使用win自带的telnet工具来测试(控制面板-》程序和控制-》开启或关闭window功能,勾选telnet)。打开cmd,输入
telnet localhost 8080
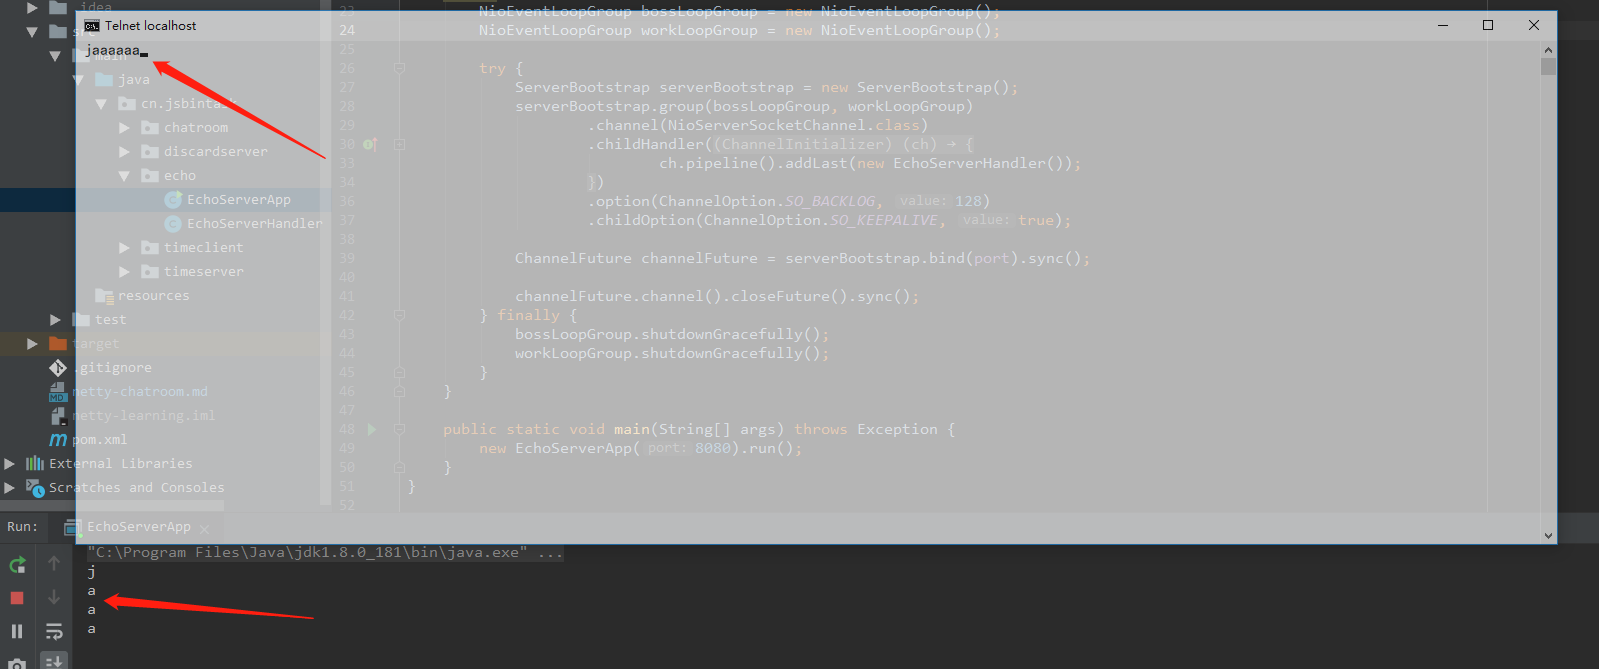
测试成功,我们完成了第一个demo,实现了自己的print协议。接下来我们把客户端也换成netty编写。目的:启动客户端,获取服务端时间,叫time协议。
Time Protocol
首先同上面一样,写一个TimeServerHandler:
public class TimeServerHandler extends ChannelInboundHandlerAdapter {

    @Override
    public void channelActive(ChannelHandlerContext ctx) throws Exception {
        ByteBuf timeBuf = ctx.alloc().buffer();
        timeBuf.writeBytes(new SimpleDateFormat("yyyy-MM-dd HH:mm:ss").format(new Date()).getBytes());

        ChannelFuture channelFuture = ctx.writeAndFlush(timeBuf);
        channelFuture.addListener(new GenericFutureListener<Future<? super Void>>() {
            @Override
            public void operationComplete(Future<? super Void> future) throws Exception {
                assert channelFuture == future;

                // ctx.close();
            }
        });
    }

    @Override
    public void exceptionCaught(ChannelHandlerContext ctx, Throwable cause) { // (4)
        // Close the connection when an exception is raised.
        cause.printStackTrace();
        ctx.close();
    }
}
启动类同上,接下来,编写客户端TimeClientHandler:
public class TimeClientHandler extends ChannelInboundHandlerAdapter {

    @Override
    public void channelRead(ChannelHandlerContext ctx, Object msg) {
        try {
            ByteBuf byteBuf = (ByteBuf) msg;
            int length = byteBuf.readableBytes();
            byte[] buff = new byte[1024];
            byteBuf.readBytes(buff, 0, length);
            System.out.println("current time: " + new String(buff, 0, length));
            ctx.close();
        } finally {
            ReferenceCountUtil.release(msg);
        }
    }

    @Override
    public void exceptionCaught(ChannelHandlerContext ctx, Throwable cause) {
        // Close the connection when an exception is raised.
        cause.printStackTrace();
        ctx.close();
    }
}
分别启动服务端,客户端。
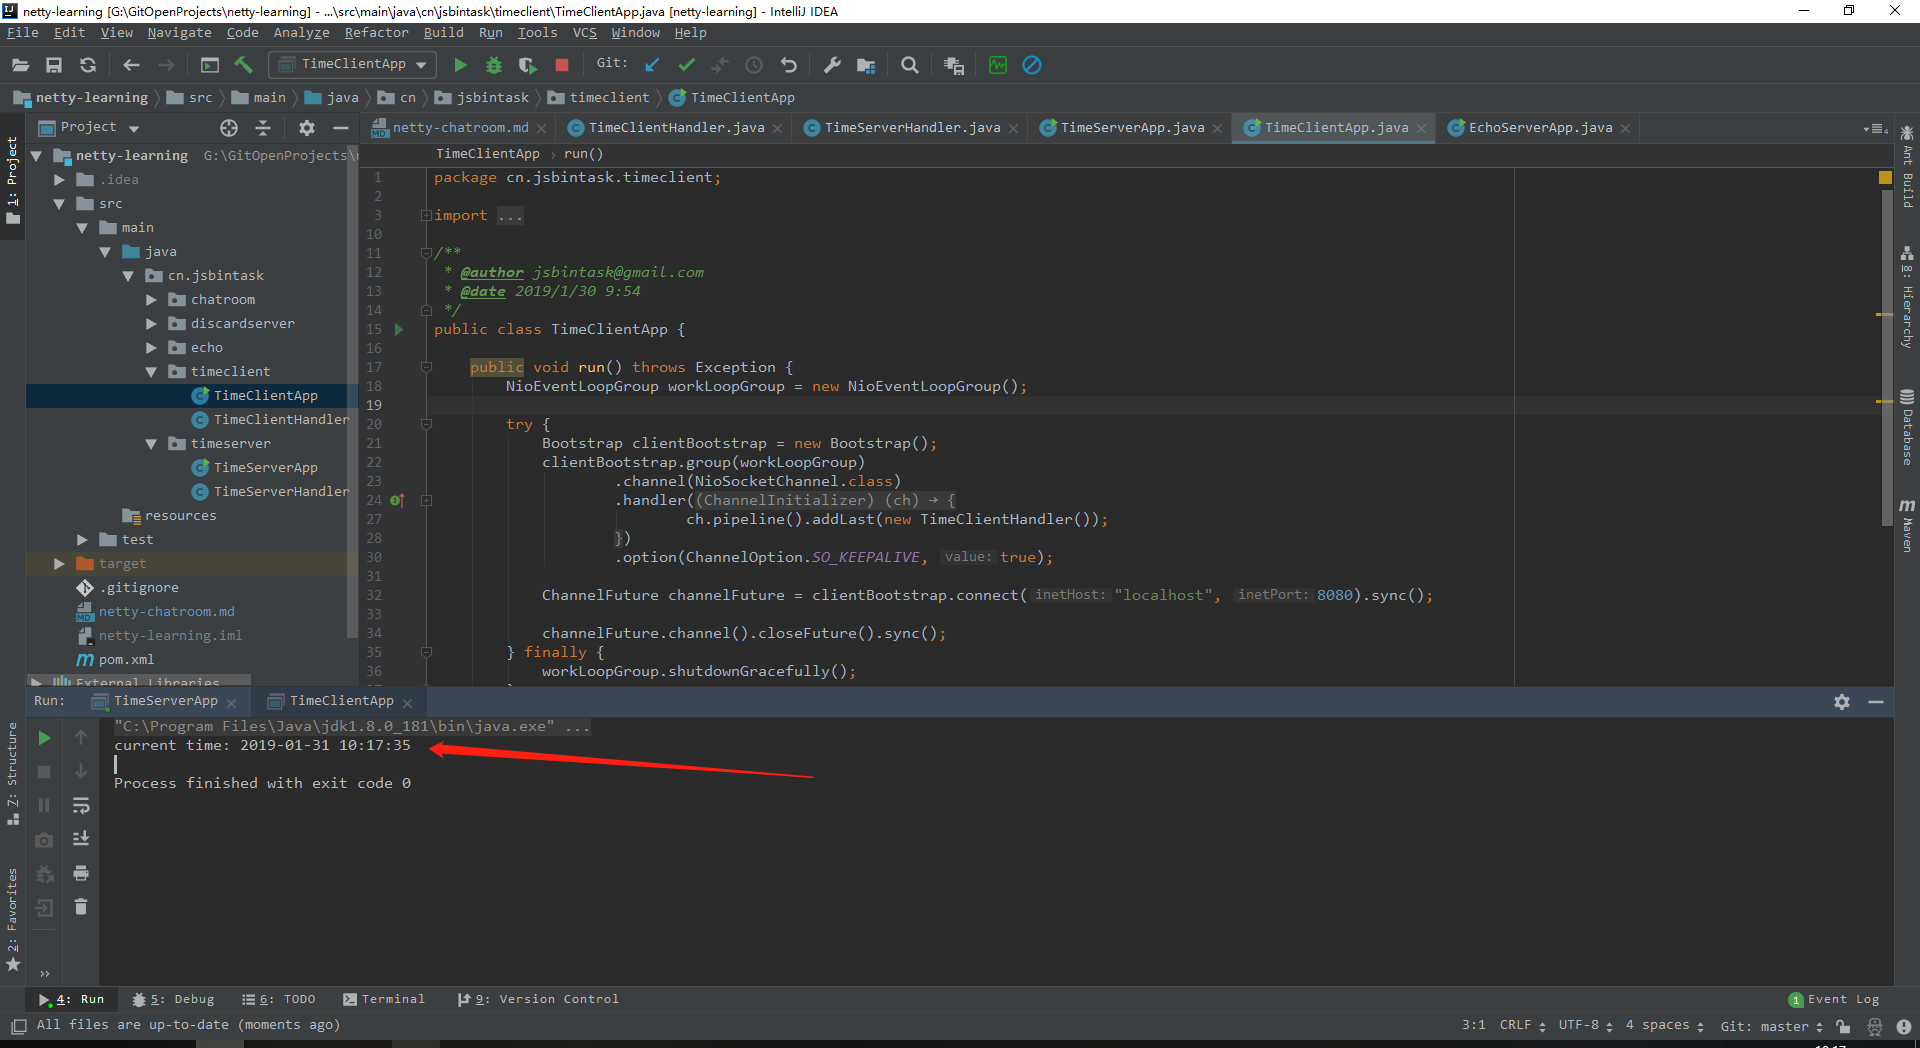
测试结果如图,客户端启动后拿到了服务端的时间,这样我们就实现了自己的time protocol,接下来继续扩展,编写一个客户端与服务端通信的聊天室:
chatroom server
首先,客户端与服务端通信的信息我们抽象出一个对象,Message以及工具类:
@Data
@NoArgsConstructor
@AllArgsConstructor
public class Message {
    private String username;
    private Date sentTime;
    private String msg;
}
public class Utils {
    public static String encodeMsg(Message message) {
        return message.getUsername() + "~" + (new SimpleDateFormat("yyyy-MM-dd HH:mm:ss").format(message.getSentTime())) + "~" + message.getMsg();
    }

    public static String formatDateTime(Date time) {
        return new SimpleDateFormat("yyyy-MM-dd HH:mm:ss").format(time);
    }

    public static Date parseDateTime(String time) {
        try {
            return new SimpleDateFormat("yyyy-MM-dd Hh:mm:ss").parse(time);
        } catch (ParseException e) {
            return null;
        }
    }

    public static void printMsg(Message msg) {
        System.out.println("=================================================================================================");
        System.out.println("                      " + Utils.formatDateTime(msg.getSentTime()) + "                     ");
        System.out.println(msg.getUsername() + ": " + msg.getMsg());
        System.out.println("=================================================================================================");

    }
}
三个属性分别代表用户名,发送时间,消息内容,接着编写一个用于处理输入消息的handler,用于将byte消息转换成Message,ServerTransferMsgHandler:
public class ServerTransferMsgHandler extends ByteToMessageDecoder {

    @Override
    protected void decode(ChannelHandlerContext ctx, ByteBuf in, List<Object> out) throws Exception {
        String totalMsg = in.readCharSequence(in.readableBytes(), Charset.forName("utf-8")).toString();
        String[] content = totalMsg.split("~");
        out.add(new Message(content[0], Utils.parseDateTime(content[1]), content[2]));
    }
}
接着,编写一个处理接收消息的Handler,用于打印客户端发送过来的消息,ServerMsgHandler:
public class ServerMsgHandler extends ChannelInboundHandlerAdapter {

    @Override
    public void channelActive(ChannelHandlerContext ctx) throws Exception {
        System.out.println("jsbintask-client进入聊天室。");

        Message message = new Message(Constants.SERVER, new Date(), "Hello, I'm jsbintask-server side.");
        ByteBuf buffer = ctx.alloc().buffer();
        String content = Utils.encodeMsg(message);
        buffer.writeBytes(content.getBytes());

        ctx.writeAndFlush(buffer);
    }


    @Override
    public void channelRead(ChannelHandlerContext ctx, Object msg1) throws Exception {
        try {
            Message msg = (Message) msg1;
            Utils.printMsg(msg);
            Scanner scanner = new Scanner(System.in);
            System.out.print("jsbintask-server, please input msg: ");
            String reply = scanner.nextLine();


            Message message = new Message(Constants.SERVER, new Date(), reply);
            ctx.writeAndFlush(message);
        } finally {
            ReferenceCountUtil.release(msg1);
        }
    }

    @Override
    public void exceptionCaught(ChannelHandlerContext ctx, Throwable cause) throws Exception {
        cause.printStackTrace();
        ctx.close();
    }
}
知道注意的是,channelActive方法,在客户端链接的时候,率先给客户端发送了一条消息,最后,在编写一个用户将服务端Message转成Byte消息的handler,MessageEncoder:
public class MessageEncoder extends MessageToByteEncoder<Message> {
    @Override
    protected void encode(ChannelHandlerContext ctx, Message message, ByteBuf out) throws Exception {
        ByteBuf buffer = ctx.alloc().buffer();
        String content = Utils.encodeMsg(message);
        buffer.writeBytes(content.getBytes(StandardCharsets.UTF_8));

        ctx.writeAndFlush(buffer);
    }
}
最后,编写server端启动类,ChatroomServerApp:
public class ChatroomServerApp {
    public static void main(String[] args) throws Exception {
        NioEventLoopGroup bossGroup = new NioEventLoopGroup();
        NioEventLoopGroup workGroup = new NioEventLoopGroup();

        try {
            ServerBootstrap serverBootstrap = new ServerBootstrap();
            serverBootstrap.group(bossGroup, workGroup)
                    .channel(NioServerSocketChannel.class)
                    .childHandler(new ChannelInitializer() {
                        @Override
                        protected void initChannel(Channel ch) throws Exception {
                            ch.pipeline().addLast(new MessageEncoder(), new ServerTransferMsgHandler(), new ServerMsgHandler());
                        }
                    })
                    .option(ChannelOption.SO_BACKLOG, 1024 * 10)
                    .childOption(ChannelOption.SO_KEEPALIVE, true);

            ChannelFuture channelFuture = serverBootstrap.bind(8888).sync();
            channelFuture.channel().closeFuture().sync();
        } finally {
            bossGroup.shutdownGracefully();
            workGroup.shutdownGracefully();
        }
    }
}
启动Server,继续编写ChatroomClient。
chatroom client
同server端一样,client的关键也是handler,ClientMsgHandler如下:
public class ClientMsgHandler extends SimpleChannelInboundHandler<Message> {
    @Override
    public void channelActive(ChannelHandlerContext ctx) throws Exception {
        super.channelActive(ctx);
    }

    @Override
    protected void channelRead0(ChannelHandlerContext ctx, Message msg) throws Exception {
        try {
            Utils.printMsg(msg);
            Scanner scanner = new Scanner(System.in);
            System.out.print("jsbintask-client, please input msg: ");
            String reply = scanner.nextLine();

            Message message = new Message(Constants.CLIENT, new Date(), reply);
            ByteBuf buffer = ctx.alloc().buffer();
            String content = message.getUsername() + "~" + Utils.formatDateTime(message.getSentTime()) + "~" + message.getMsg();
            buffer.writeBytes(content.getBytes(StandardCharsets.UTF_8));
            ctx.writeAndFlush(buffer);
        } finally {
            ReferenceCountUtil.release(msg);
        }
    }
}
接着,同样有将byte转换成Message的转换器,CliengMsgHandler:
public class ClientTransferMsgHandler extends ByteToMessageDecoder {
    @Override
    protected void decode(ChannelHandlerContext ctx, ByteBuf in, List<Object> out) throws Exception {
        byte[] buff = new byte[2024];
        int length = in.readableBytes();
        in.readBytes(buff, 0, length);

        String totalMsg = new String(buff, 0, length, StandardCharsets.UTF_8);
        String[] content = totalMsg.split("~");
        out.add(new Message(content[0], Utils.parseDateTime(content[1]), content[2]));
    }
}
最后,启动类ChatroomClientApp:
public class ChatroomClientApp {
    public static void main(String[] args) throws Exception {
        NioEventLoopGroup workLoopGroup = new NioEventLoopGroup();

        try {
            Bootstrap clientBootstrap = new Bootstrap();
            clientBootstrap.group(workLoopGroup)
                    .channel(NioSocketChannel.class)
                    .handler(new ChannelInitializer<SocketChannel>() {
                        @Override
                        protected void initChannel(SocketChannel ch) throws Exception {
                            ch.pipeline().addLast(new ClientTransferMsgHandler(), new ClientMsgHandler());
                        }
                    })
                    .option(ChannelOption.SO_KEEPALIVE, true);

            ChannelFuture channelFuture = clientBootstrap.connect("localhost", 8888).sync();

            channelFuture.channel().closeFuture().sync();
        } finally {
            workLoopGroup.shutdownGracefully();
        }
    }
}
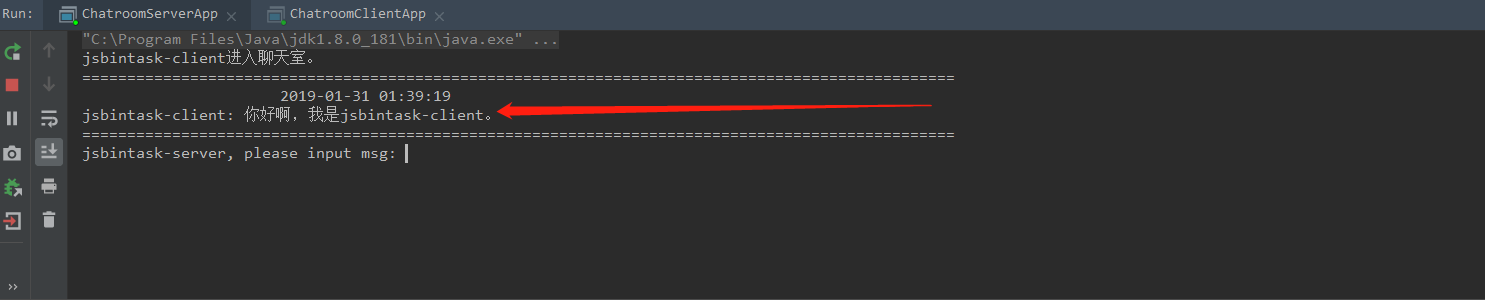
同样启动client,观察控制台。首先,server端提示client进入了聊天室,并且客户端看到了server端发送过来的”招呼“信息:
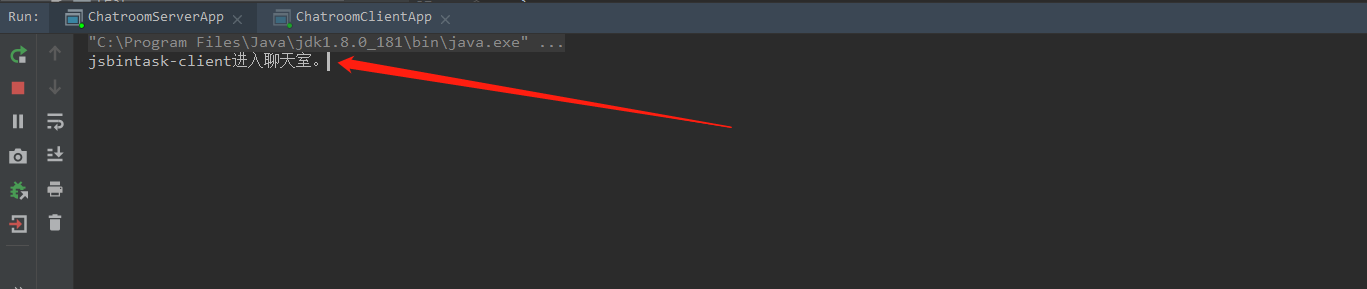

这样就代表我们的链接建立完毕,接着,客户端,服务端相互发送消息:

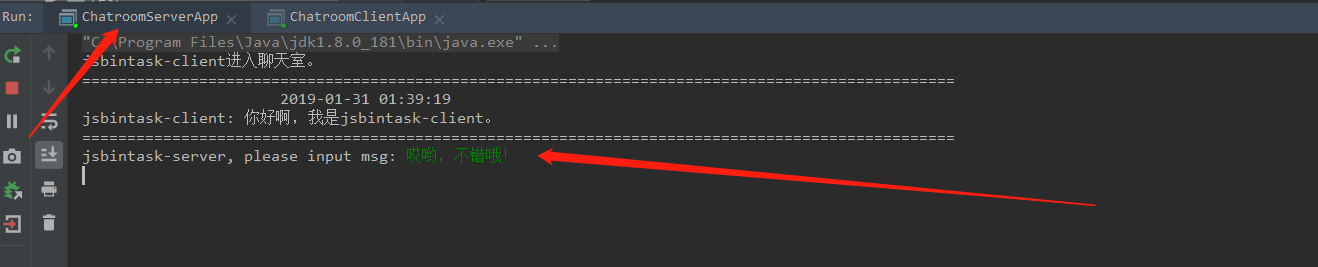
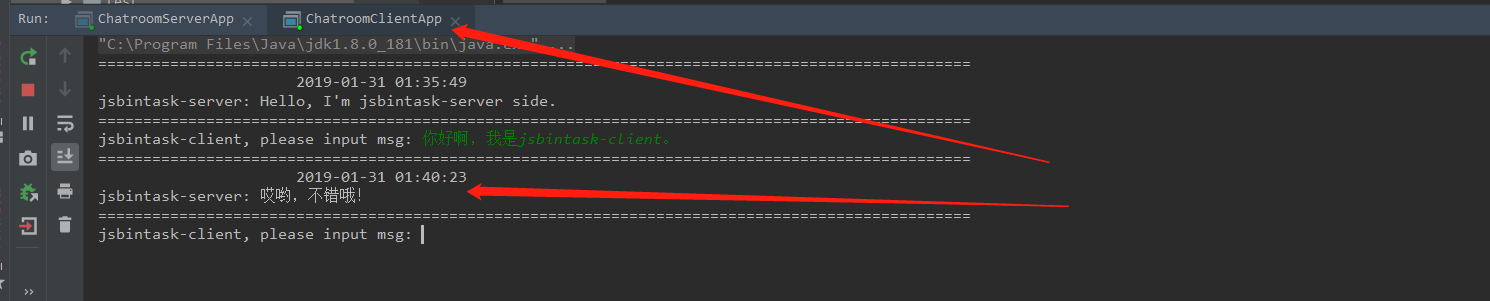
如图,这样,我们的聊天室也就编写成功了,完整demo如下:
[图片上传失败...(image-1cea11-1548903448254)]
总结
本章,我们开启了学习netty的大门,首先介绍了netty,为什么要学netty,并且通过三个案例一步一步实现了聊天室,成功踏入了netty的大门,下一章,我们就来学习一下netty的架构!
例子源码:https://github.com/jsbintask22/netty-learning.git,欢迎fork,star学习修改。
本文原创地址:https://jsbintask.cn/2019/01/30/netty/netty-chatroom/,转载请注明出处。
如果你觉得本文对你有用,欢迎关注,分享!


