上一篇我们说到在Activity中setContentView()其实调用的就是PhoneWindow的setContentView();然后对DecorView进行初始化,DecorView是PhoneWindow的内部类又是FrameLayout 的子类,其实DecorView就是这个屏幕的View。在mDecor初始化完成之后我们看到这样一段代码, mContentParent = generateLayout(mDecor);我们进入看它是怎么实现的,代码比较多,我们找关键的看
protected ViewGroup generateLayout(DecorView decor) {
     …………
  /*根据不同的属性设置不同的title*/
        if (a.getBoolean(com.android.internal.R.styleable.Window_windowNoTitle, false)) {
            requestFeature(FEATURE_NO_TITLE);
        } else if (a.getBoolean(com.android.internal.R.styleable.Window_windowActionBar, false)) {
            // Don't allow an action bar if there is no title.
            requestFeature(FEATURE_ACTION_BAR);
        }

       …………
        if (a.getBoolean(com.android.internal.R.styleable.Window_windowFullscreen, false)) {
            setFlags(FLAG_FULLSCREEN, FLAG_FULLSCREEN & (~getForcedWindowFlags()));
        }
       …………
        int layoutResource;
       …………
  /*根据不同的属性找到相应的layout*/
    } else if ((features & (1 << FEATURE_NO_TITLE)) == 0) {
     …………
     } else { layoutResource = com.android.internal.R.layout.screen_title; }
    …………
     { layoutResource = com.android.internal.R.layout.screen_simple; }
  /*加载layout,然后add到DecorView中,inflate方法是加载xml文件的,在listView的getView中和fragment的onCreateView中用的比较多,具体源码我们以后在分析。*/
        View in = mLayoutInflater.inflate(layoutResource, null);
        decor.addView(in, new ViewGroup.LayoutParams(MATCH_PARENT, MATCH_PARENT));

        ViewGroup contentParent = (ViewGroup)findViewById(ID_ANDROID_CONTENT);
        …………
            if (mTitle != null) {
                setTitle(mTitle);
            }
            setTitleColor(mTitleColor);
       …………
        return contentParent;}
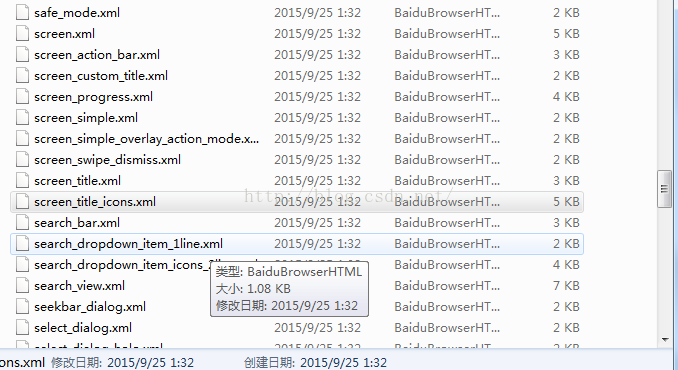
我们通过查找发现,Android系统自定义的layout有很多,下面只截图了一部分,
通过上面代码我们可以看出generateLayout返回的是contentParent,它其实就是我们自定义layout的父控件,其中ID_ANDROID_CONTENT是在window类中定义的,
/**
     * The ID that the main layout in the XML layout file should have.
     */
    public static final int ID_ANDROID_CONTENT = com.android.internal.R.id.content;
系统自定义的那些layout都有这个ID为content的View,我们可以随便打开一个看看,下面是screen_title.xml
<!--
This is an optimized layout for a screen, with the minimum set of features
enabled.
-->

<LinearLayout xmlns:android="http://schemas.android.com/apk/res/android"
    android:orientation="vertical"
    android:fitsSystemWindows="true">
    <!-- Popout bar for action modes -->
    <ViewStub android:id="@+id/action_mode_bar_stub"
              android:inflatedId="@+id/action_mode_bar"
              android:layout="@layout/action_mode_bar"
              android:layout_width="match_parent"<strong></strong>
              android:layout_height="wrap_content" />
    <FrameLayout
        android:layout_width="match_parent"
        android:layout_height="?android:attr/windowTitleSize"
        style="?android:attr/windowTitleBackgroundStyle"><font size="" color=""></font>
        <TextView android:id="@android:id/title"
            style="?android:attr/windowTitleStyle"
            android:background="@null"
            android:fadingEdge="horizontal"
            android:gravity="center_vertical"
            android:layout_width="match_parent"
            android:layout_height="match_parent" />
    </FrameLayout>
    <FrameLayout
    android:id="@android:id/content"
    android:layout_width="match_parent"
        android:layout_height="0dip"
        android:layout_weight="1"
        android:foregroundGravity="fill_horizontal|top"
        android:foreground="?android:attr/windowContentOverlay" />
</LinearLayout>
到目前为止我们已经把setContentView()的源码分析的差不多了,可能还会有很多人感到困惑,View是怎么显示到Activity上的,我们仔细查看在Activity中找到这样一段代码
void makeVisible() {
        if (!mWindowAdded) {
            ViewManager wm = getWindowManager();
            wm.addView(mDecor, getWindow().getAttributes());
            mWindowAdded = true;
        }
        mDecor.setVisibility(View.VISIBLE);
    }
看到这里可能有的人就笑了,这个mDecor不就是我们上面讲到的DecorView吗,那么makeVisible又是在什么地方调用的?通过源码查找我们发现有这样一个方法,通过注释我们大概能明白就是如果不打算显示UI它本身,可以使用,默认的是在Activity配置中设置,这个我们一般用的比较少,
/**
     * Control whether this activity's main window is visible.  This is intended
     * only for the special case of an activity that is not going to show a
     * UI itself, but can't just finish prior to onResume() because it needs
     * to wait for a service binding or such.  Setting this to false allows
     * you to prevent your UI from being shown during that time.
     *
     * <p>The default value for this is taken from the
     * {@link android.R.attr#windowNoDisplay} attribute of the activity's theme.
     */
    public void setVisible(boolean visible) {
        if (mVisibleFromClient != visible) {
            mVisibleFromClient = visible;
            if (mVisibleFromServer) {
                if (visible) makeVisible();
                else mDecor.setVisibility(View.INVISIBLE);
            }
        }
    }
除了在Activity中调用makeVisible()方法,我们发现在ActivityThread类中也调用了这个方法,上一篇我们说过这个类比较重要,除了在main方法中初始化looper以外,还负责Activity的生命周期的调用,等以后有时间讲到Android的消息机制时,大家可能就会知道我们在主线程中不需要初始化looper,而在子线程处理消息是必须要初始化looper,原因就在这。好了,言归正传,刚才说到在ActivityThread类中调用makeVisible()方法,一共有两处,一处是
private void updateVisibility(ActivityClientRecord r, boolean show) {
      …………
       r.activity.makeVisible();
         …………
    }
它主要是在StopActivity和WindowVisibility时调用,这里就不在介绍,但是还有一处地方,大家看到可能会感觉比较熟悉,上源码,代码比较多,我们就看我们要看的,其他的略过
final void handleResumeActivity(IBinder token, boolean clearHide, boolean isForward,
            boolean reallyResume) {
       …………
        ActivityClientRecord r = performResumeActivity(token, clearHide);


        if (r != null) {
            final Activity a = r.activity;
        …………
                    if (r.activity.mVisibleFromClient) {
                        ViewManager wm = a.getWindowManager();
                        View decor = r.window.getDecorView();
                        wm.updateViewLayout(decor, l);
        …………
                if (r.activity.mVisibleFromClient) {
               r.activity.makeVisible()
                }
            }
         …………
    }    final void handleResumeActivity(IBinder token, boolean clearHide, boolean isForward,
            boolean reallyResume) {
       …………
        ActivityClientRecord r = performResumeActivity(token, clearHide);

        if (r != null) {
            final Activity a = r.activity;
        …………
                    if (r.activity.mVisibleFromClient) {
                        ViewManager wm = a.getWindowManager();
                        View decor = r.window.getDecorView();
                        wm.updateViewLayout(decor, l);
        …………
                if (r.activity.mVisibleFromClient) {
               r.activity.makeVisible()
                }
            }
         …………
    }
其实在它内部调用的就有Activity的Onresume()方法,那么handleResumeActivity除了在handler的RESUME_ACTIVITY分支调用外又在handleLaunchActivity()这个方法中调用的,
private void handleLaunchActivity(ActivityClientRecord r, Intent customIntent) {
       …………
       /*performLaunchActivity方法除了创建Activity以外还调用了Activity的onCreate()方法和onStart()方法,在这里我们就先不在介绍,我们知道就行了,以后有时间在单独介绍这块*/
        Activity a = performLaunchActivity(r, customIntent);

       …………
            handleResumeActivity(r.token, false, r.isForward,
                    !r.activity.mFinished && !r.startsNotResumed);
           …………
    }
好了,我们先回到刚才讲的makeVisible方法中来,我们知道mDecor就是我们看到的整个页面,然后让它VISIBLE,但是在它之前是怎么add的, 我们看到这样一段代码wm.addView(mDecor, getWindow().getAttributes());然后我们在看看ViewManager 类
/** Interface to let you add and remove child views to an Activity. To get an instance
  * of this class, call {@link android.content.Context#getSystemService(java.lang.String) Context.getSystemService()}.
  */
public interface ViewManager
{
    public void addView(View view, ViewGroup.LayoutParams params);
    public void updateViewLayout(View view, ViewGroup.LayoutParams params);
    public void removeView(View view);
}
发现他只是一个接口,有3个方法,增加,更新,删除,对于管理View已经足够了,通过源码我们发现WindowManager 是实现ViewManager 接口的。
public interface WindowManager extends ViewManager {但他是在什么地方实现的呢,我们在Activity的attach方法中看到这样的一行代码
final void attach(Context context, ActivityThread aThread,
            Instrumentation instr, IBinder token, int ident,
            Application application, Intent intent, ActivityInfo info,
            CharSequence title, Activity parent, String id,
            NonConfigurationInstances lastNonConfigurationInstances,
            Configuration config) {
        …………
        mWindow.setWindowManager(
                (WindowManager)context.getSystemService(Context.WINDOW_SERVICE),
                mToken, mComponent.flattenToString(),
                (info.flags & ActivityInfo.FLAG_HARDWARE_ACCELERATED) != 0);
       …………
        mWindowManager = mWindow.getWindowManager();
        …………
    }
我们继续查看源码
public void setWindowManager(WindowManager wm, IBinder appToken, String appName,
            boolean hardwareAccelerated) {
        mAppToken = appToken;
        mAppName = appName;
        mHardwareAccelerated = hardwareAccelerated
                || SystemProperties.getBoolean(PROPERTY_HARDWARE_UI, false);
        if (wm == null) {
            wm = (WindowManager)mContext.getSystemService(Context.WINDOW_SERVICE);
        }
      mWindowManager = ((WindowManagerImpl)wm).createLocalWindowManager(this);
    }
看到了吧WindowManager的真正实现类是WindowManagerImpl,它里面封装的是WindowManagerGlobal,所有的操作都是通过WindowManagerGlobal来实现的,方法比较多,我们就随便挑一个看看,其他的就不在分析了
public void addView(View view, ViewGroup.LayoutParams params,
            Display display, Window parentWindow) {
       …………
        ViewRootImpl root;
       …………

            root = new ViewRootImpl(view.getContext(), display);

            view.setLayoutParams(wparams);

            mViews.add(view);
            mRoots.add(root);
            mParams.add(wparams);
        }

        // do this last because it fires off messages to start doing things
        try {
          root.setView(view, wparams, panelParentView);
        } catch (RuntimeException e) {
          …………
        }
    }
我们看到了ViewRootImpl这个类,这个类是ViewParent的子类,不能小看这个类,所有View的子类的measure,Layout,Draw包括事件的分发机制都要经过它,这里我们知道就行,就先不在介绍。mViews和mRoots其实就是个list,这里看最后加粗的一行代码,我们继续跟踪,找到它,
/**
     * We have one child
     */
    public void setView(View view, WindowManager.LayoutParams attrs, View panelParentView) {
      …………
                mFallbackEventHandler.setView(view);
             …………
               mAttachInfo.mRootView = view;
               …………
               requestLayout();
              …………
                    res = mWindowSession.addToDisplay(mWindow, mSeq, mWindowAttributes,
                            getHostVisibility(), mDisplay.getDisplayId(),
                            mAttachInfo.mContentInsets, mInputChannel);
              …………

                if (mTranslator != null) {
                    mTranslator.translateRectInScreenToAppWindow(mAttachInfo.mContentInsets);
                }
                mPendingOverscanInsets.set(0, 0, 0, 0);
                mPendingContentInsets.set(mAttachInfo.mContentInsets);
                mPendingVisibleInsets.set(0, 0, 0, 0);
                if (DEBUG_LAYOUT) Log.v(TAG, "Added window " + mWindow);
                if (res < WindowManagerGlobal.ADD_OKAY) {
                    mAttachInfo.mRootView = null;
                    mAdded = false;
                    mFallbackEventHandler.setView(null);
                    unscheduleTraversals();
                    setAccessibilityFocus(null, null);
                    switch (res) {
                        case WindowManagerGlobal.ADD_BAD_APP_TOKEN:
                        case WindowManagerGlobal.ADD_BAD_SUBWINDOW_TOKEN:
                            throw new WindowManager.BadTokenException(
                                "Unable to add window -- token " + attrs.token
                                + " is not valid; is your activity running?");
                        case WindowManagerGlobal.ADD_NOT_APP_TOKEN:
                            throw new WindowManager.BadTokenException(
                                "Unable to add window -- token " + attrs.token
                                + " is not for an application");
                        case WindowManagerGlobal.ADD_APP_EXITING:
                            throw new WindowManager.BadTokenException(
                                "Unable to add window -- app for token " + attrs.token
                                + " is exiting");
                        case WindowManagerGlobal.ADD_DUPLICATE_ADD:
                            throw new WindowManager.BadTokenException(
                                "Unable to add window -- window " + mWindow
                                + " has already been added");
                        case WindowManagerGlobal.ADD_STARTING_NOT_NEEDED:
                            // Silently ignore -- we would have just removed it
                            // right away, anyway.
                            return;
                        case WindowManagerGlobal.ADD_MULTIPLE_SINGLETON:
                            throw new WindowManager.BadTokenException(
                                "Unable to add window " + mWindow +
                                " -- another window of this type already exists");
                        case WindowManagerGlobal.ADD_PERMISSION_DENIED:
                            throw new WindowManager.BadTokenException(
                                "Unable to add window " + mWindow +
                                " -- permission denied for this window type");
                        case WindowManagerGlobal.ADD_INVALID_DISPLAY:
                            throw new WindowManager.InvalidDisplayException(
                                "Unable to add window " + mWindow +
                                " -- the specified display can not be found");
                    }
                    throw new RuntimeException(
                        "Unable to add window -- unknown error code " + res);
                }
                …………
             view.assignParent(this)
        …………
            }
        }
    }
如果大家看到上面抛出的异常是不是很激动,我们知道一个dialog或者PopupWindow必须在Activity中弹出,如果Activity不存在了,那么我们通过handle弹出的dialog或者Popupwindow就会报上面所呈现的异常。在上面我们还看到了这样一段代码mAttachInfo.mRootView = view,那么mAttachInfo又是什么呢,在ViewrootImpl的构造函数中看到这样一段代码,mAttachInfo = new View.AttachInfo(mWindowSession, mWindow, display, this, mHandler, this);,我们知道Attachinfo是View的内部类,
在它内部我们找到了它
/**
         * The view root impl.
         */
        final ViewRootImpl mViewRootImpl;
所以
mDecor通过windwManager把它加载到ViewrootImpl的mAttachinfo之后,在Activity启动的时候通过调用Activity的makeVisible()方法把它显示出来,好了,setContentView的方法已经分析完了,有时间在把其他的也都给不上,自己分析难免会有疏忽,欢迎大家一块讨论,谢谢。
android:layout_height="0dip"
        android:layout_weight="1"
        android:foregroundGravity="fill_horizontal|top"
        android:foreground="?android:attr/windowContentOverlay" />
</LinearLayout>


