- 1.说明:
最近一直在研究深度学习框架PyTorch,就想使用pytorch去实现YOLOv3的object detection.在这个过程中也在各大论坛、贴吧、CSDN等中看了前辈们写的文章,在这里由衷的感谢帮助过我的朋友们,真的很感谢!!!!
接下来就将这一过程写在下面,希望对在学习计算机视觉的小伙伴有一定的帮助
- 2.环境:
笔者的环境:
ubuntu18.04
PyTorch 1.1.0
anaconda
opencv-python
tqdm
matplotlib
pycocotools
如果没有实验环境可以使用如下的方法进行构建:
建议大家安装anaconda,安装过程自行Google,这里就不做过多的解释了
pip install opencv-python
pip install tqdm
pip install matplotlib
pip install pycocotools- ## 制作数据集
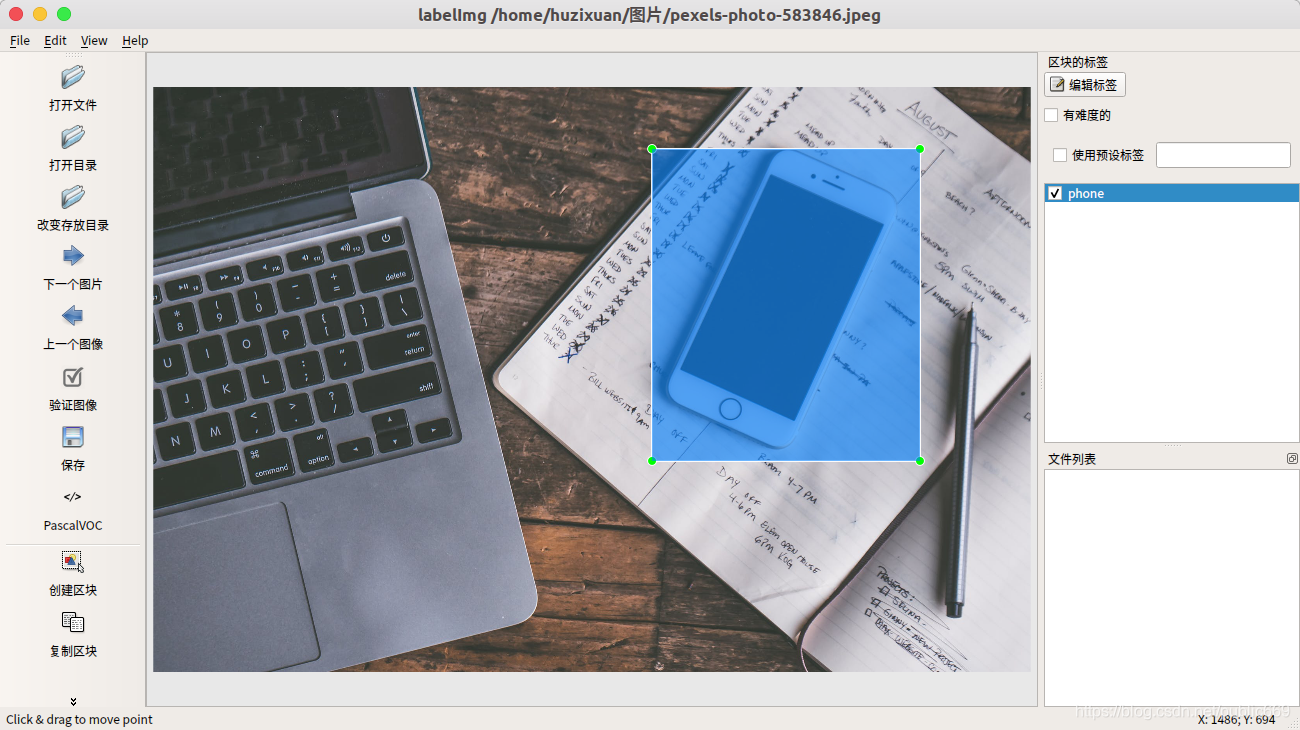
制作数据集时,我们需要使用labelImge标注工具,安装过程请参考安装标注工具
 Pytorch实现YOLOv3训练自己的数据集_xml](https://file.cfanz.cn/uploads/png/2022/05/11/2/Ye86J6A46H.png)
本次我们使用的数据集已经标注好了,我们直接拿过来用:https://github.com/cosmicad/dataset
 Pytorch实现YOLOv3训练自己的数据集_ide_02](https://file.cfanz.cn/uploads/png/2022/05/11/2/M5ZN821F4a.png)
- ## 相关准备
https://github.com/ultralytics/yolov3
首先从上述链接上将pytorch框架clone下来,放在pycharm的工程目录下,这里我把文件重新命名为YOLOV3,这个随便大家。
 Pytorch实现YOLOv3训练自己的数据集_xml_03](https://file.cfanz.cn/uploads/png/2022/05/11/2/Gc8cUW6G9D.png)
需要说明一下,clone下来的文件一开始是没有makeTxt.py和voc_label.py文件的,这两个需要我们后面自己写代码
- ## 数据装载
将数据集Annotations、JPEGImages复制到YOLOV3工程目录下的data文件下;同时新建两个文件夹,分别命名为ImageSets和labels,最后我们将JPEGImages文件夹复制粘贴一下,并将文件夹重命名为images
 Pytorch实现YOLOv3训练自己的数据集_ide_04](https://file.cfanz.cn/uploads/png/2022/05/11/2/25c1eDG65C.png)
- ## 构建代码
在工程的根目录下新建一个文件makeTxt.py,代码如下:
import os
import random
trainval_percent = 0.1
train_percent = 0.9
xmlfilepath = 'data/Annotations'
txtsavepath = 'data/ImageSets'
total_xml = os.listdir(xmlfilepath)
num = len(total_xml)
list = range(num)
tv = int(num * trainval_percent)
tr = int(tv * train_percent)
trainval = random.sample(list, tv)
train = random.sample(trainval, tr)
ftrainval = open('data/ImageSets/trainval.txt', 'w')
ftest = open('data/ImageSets/test.txt', 'w')
ftrain = open('data/ImageSets/train.txt', 'w')
fval = open('data/ImageSets/val.txt', 'w')
for i in list:
    name = total_xml[i][:-4] + '\n'
    if i in trainval:
        ftrainval.write(name)
        if i in train:
            ftest.write(name)
        else:
            fval.write(name)
    else:
        ftrain.write(name)
ftrainval.close()
ftrain.close()
fval.close()
ftest.close()
接着再新建另一个文件voc_label.py,代码如下:
import xml.etree.ElementTree as ET
import pickle
import os
from os import listdir, getcwd
from os.path import join
sets = ['train', 'test','val']
classes = ["RBC"]
def convert(size, box):
    dw = 1. / size[0]
    dh = 1. / size[1]
    x = (box[0] + box[1]) / 2.0
    y = (box[2] + box[3]) / 2.0
    w = box[1] - box[0]
    h = box[3] - box[2]
    x = x * dw
    w = w * dw
    y = y * dh
    h = h * dh
    return (x, y, w, h)
def convert_annotation(image_id):
    in_file = open('data/Annotations/%s.xml' % (image_id))
    out_file = open('data/labels/%s.txt' % (image_id), 'w')
    tree = ET.parse(in_file)
    root = tree.getroot()
    size = root.find('size')
    w = int(size.find('width').text)
    h = int(size.find('height').text)
    for obj in root.iter('object'):
        difficult = obj.find('difficult').text
        cls = obj.find('name').text
        if cls not in classes or int(difficult) == 1:
            continue
        cls_id = classes.index(cls)
        xmlbox = obj.find('bndbox')
        b = (float(xmlbox.find('xmin').text), float(xmlbox.find('xmax').text), float(xmlbox.find('ymin').text),
             float(xmlbox.find('ymax').text))
        bb = convert((w, h), b)
        out_file.write(str(cls_id) + " " + " ".join([str(a) for a in bb]) + '\n')
wd = getcwd()
print(wd)
for image_set in sets:
    if not os.path.exists('data/labels/'):
        os.makedirs('data/labels/')
    image_ids = open('data/ImageSets/%s.txt' % (image_set)).read().strip().split()
    list_file = open('data/%s.txt' % (image_set), 'w')
    for image_id in image_ids:
        list_file.write('data/images/%s.jpg\n' % (image_id))
        convert_annotation(image_id)
    list_file.close()
分别运行makeTxt.py和voc_label.py
运行makeTxt.py后ImagesSets后面会出现四个文件,如下图:
主要存储图片名称
 Pytorch实现YOLOv3训练自己的数据集_ide_05](https://file.cfanz.cn/uploads/png/2022/05/11/2/ETI373e72I.png)
运行voc_label.py后labels后,如下图所示:
这里得到的不光是文件名,还有文件的具体路径
 Pytorch实现YOLOv3训练自己的数据集_ide_06](https://file.cfanz.cn/uploads/png/2022/05/11/2/OKBHC5eB0H.png) 接着还要配置两个文件在data文件下新建rbc.data,配置内容如下:
接着还要配置两个文件在data文件下新建rbc.data,配置内容如下:
classes=1
train=data/train.txt
valid=data/test.txt
names=data/rbc.names
backup=backup/
eval=coco
再在data文件下新建rbc.names,配置内容如下:
RBC Pytorch实现YOLOv3训练自己的数据集_python_07](https://file.cfanz.cn/uploads/png/2022/05/11/2/ObJJU3Xa23.png)
- ## 修改cfg
我们需要将cfg下的yolov3-tiny.cfg文件进行修改,修改内容如下:
[net]
# Testing
batch=1
subdivisions=1
# Training
# batch=64
# subdivisions=2
width=416
height=416
channels=3
momentum=0.9
decay=0.0005
angle=0
saturation = 1.5
exposure = 1.5
hue=.1

learning_rate=0.001
burn_in=1000
max_batches = 500200
policy=steps
steps=400000,450000
scales=.1,.1

[convolutional]
batch_normalize=1
filters=16
size=3
stride=1
pad=1
activation=leaky

[maxpool]
size=2
stride=2

[convolutional]
batch_normalize=1
filters=32
size=3
stride=1
pad=1
activation=leaky

[maxpool]
size=2
stride=2

[convolutional]
batch_normalize=1
filters=64
size=3
stride=1
pad=1
activation=leaky

[maxpool]
size=2
stride=2

[convolutional]
batch_normalize=1
filters=128
size=3
stride=1
pad=1
activation=leaky

[maxpool]
size=2
stride=2

[convolutional]
batch_normalize=1
filters=256
size=3
stride=1
pad=1
activation=leaky

[maxpool]
size=2
stride=2

[convolutional]
batch_normalize=1
filters=512
size=3
stride=1
pad=1
activation=leaky

[maxpool]
size=2
stride=1

[convolutional]
batch_normalize=1
filters=1024
size=3
stride=1
pad=1
activation=leaky

###########

[convolutional]
batch_normalize=1
filters=256
size=1
stride=1
pad=1
activation=leaky

[convolutional]
batch_normalize=1
filters=512
size=3
stride=1
pad=1
activation=leaky

[convolutional]
size=1
stride=1
pad=1
filters=18
activation=linear


[yolo]
mask = 3,4,5
anchors = 10,14,  23,27,  37,58,  81,82,  135,169,  344,319
classes=1
num=6
jitter=.3
ignore_thresh = .7
truth_thresh = 1
random=1

[route]
layers = -4

[convolutional]
batch_normalize=1
filters=128
size=1
stride=1
pad=1
activation=leaky

[upsample]
stride=2

[route]
layers = -1, 8

[convolutional]
batch_normalize=1
filters=256
size=3
stride=1
pad=1
activation=leaky

[convolutional]
size=1
stride=1
pad=1
filters=18 #3*(class + 4 + 1)
activation=linear

[yolo]
mask = 0,1,2
anchors = 10,14,  23,27,  37,58,  81,82,  135,169,  344,319
classes=1
num=6
jitter=.3
ignore_thresh = .7
truth_thresh = 1
random=1
**需要将filters=18 #3*(class + 4 + 1)这一行改为filters=18,否则会报如下的错误:**
 Pytorch实现YOLOv3训练自己的数据集_xml_08](https://file.cfanz.cn/uploads/png/2022/05/11/2/bH31372eI6.png)
接着,获取网络参数yolov3-tiny.weights,下载链接https://pjreddie.com/media/files/yolov3-tiny.weights,下载后导入weights文件夹下;同样还需要下载yolov3-tiny.conv.15,下载导入weights文件夹下,下载链接如下:https://pan.baidu.com/s/1nv1cErZeb6s0A5UOhOmZcA
提取码:t7vp
- ## 训练
在当前项目文件下使用Terminal,可以使用pycharm中的Terminal,也可以使用liunx系统的Terminal,输入如下命令
说明:epoches 10 不是固定的,大家可以根据实际训练情况自行修改
python train.py --data-cfg data/rbc.data --cfg cfg/yolov3-tiny.cfg --epochs 10
 Pytorch实现YOLOv3训练自己的数据集_xml_09](https://file.cfanz.cn/uploads/png/2022/05/11/2/f6C8fO4V0K.png)
训练之后会得到模型:
 Pytorch实现YOLOv3训练自己的数据集_ide_10](https://file.cfanz.cn/uploads/png/2022/05/11/2/702d5Y3Z2b.png)
- ## 预测
同样在Terminal下输入以下命令:
python detect.py --data-cfg data/rbc.data --cfg cfg/yolov3-tiny.cfg --weights weights/best.pt
 Pytorch实现YOLOv3训练自己的数据集_ide_11](https://file.cfanz.cn/uploads/png/2022/05/11/2/1dH1b7U469.png)
- ## 解决一些小bug:
关于出现如下的情况
 Pytorch实现YOLOv3训练自己的数据集_ide_12](https://file.cfanz.cn/uploads/png/2022/05/11/2/95D04035Q5.png)
解决方法:
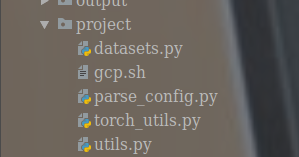
这个问题是由于本项目下有一个utils的文件目录,但是呢python本身就有一个utils;通常情况下我们是用import utils的方法导入的。解决这个问题我们只需将本项目的utils改一个名字即可,笔者是改为project的,同样也需要将相关文件进行修改,修改如下:
 Pytorch实现YOLOv3训练自己的数据集_ide_13](https://file.cfanz.cn/uploads/png/2022/05/11/2/M1OP9Q4653.png)
 Pytorch实现YOLOv3训练自己的数据集_xml_14](https://file.cfanz.cn/uploads/png/2022/05/11/2/0fe14Z75Af.png) 说明:我们需要将train.py和test.py等文件下的所有的utils全修改为project有问题欢迎添加qq:1017190168讨论,进步
说明:我们需要将train.py和test.py等文件下的所有的utils全修改为project有问题欢迎添加qq:1017190168讨论,进步
完整项目源码:
链接:https://pan.baidu.com/s/1dBaDP0ImTrAADg_KvB-0eQ


