Vue 的单元测试入门 一、基本使用
- 一、快速入门
- 二、解析
- 1. 测试框架
- 2. counter.js内容
- 3. 单元测试程序的写法
- 挂载组件方法
- 只挂载不渲染
- 测试渲染的html
- 模拟用户操作
- 异步测试组件
一、快速入门
git clone https://github.com/vuejs/vue-test-utils-getting-started
cd vue-test-utils-getting-started
npm install
npm test
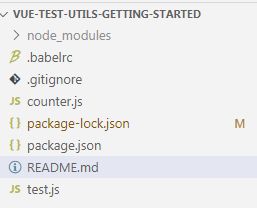
下载的示例项目如下:
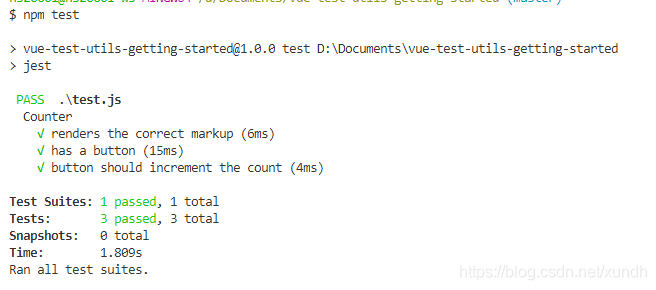
运行效果:
二、解析
1. 测试框架
项目的test使用jest,在package里可以看到依赖项:
{
  "name": "vue-test-utils-getting-started",
  "version": "1.0.0",
  "dependencies": {
    "vue": "^2.4.4"
  },
  "devDependencies": {
    "@vue/test-utils": "^1.0.0-beta.13",
    "babel-jest": "^21.2.0",
    "babel-preset-env": "^1.6.0",
    "jest": "^21.2.1",
    "regenerator-runtime": "^0.11.0",
    "vue-template-compiler": "^2.4.4"
  },
  "scripts": {
    "test": "jest"
  },
  "author": "Evan You",
  "license": "MIT"
}
如果是现有项目要加依赖支持可以使用命令:
# unit testing
vue add @vue/unit-jest

# or:
vue add @vue/unit-mocha

# end-to-end
vue add @vue/e2e-cypress

# or:
vue add @vue/e2e-nightwatch
2. counter.js内容
counter.js是一个简单的vue 文件,内容如下:
// counter.js

export default {
  template: `
    <div>
      <span class="count">{{ count }}</span>
      <button @click="increment">Increment</button>
    </div>
  `,

  data () {
    return {
      count: 0
    }
  },

  methods: {
    increment () {
      this.count++
    }
  }
}
3. 单元测试程序的写法
test.js
// Import the mount() method from the test utils
// and the component you want to test
import { mount } from '@vue/test-utils'
import Counter from './counter'

describe('Counter', () => {
  // Now mount the component and you have the wrapper
  const wrapper = mount(Counter)

  it('renders the correct markup', () => {
    expect(wrapper.html()).toContain('<span class="count">0</span>')
  })

  // it's also easy to check for the existence of elements
  it('has a button', () => {
    expect(wrapper.contains('button')).toBe(true)
  })

  it('button should increment the count', () => {
    expect(wrapper.vm.count).toBe(0)
    const button = wrapper.find('button')
    button.trigger('click')
    expect(wrapper.vm.count).toBe(1)
  })
})
挂载组件方法
Vue Test Utils 通过把组件隔离挂载,然后模拟必要的输入(prop、注入和用户事件),来对输出(渲染结果、触发的自定义事件)进行断言,从而实现单元测试。
可以使用mount 方法来创建包裹器:
test.js
// test.js

// 从测试实用工具集中导入 `mount()` 方法
// 同时导入你要测试的组件
import { mount } from '@vue/test-utils'
import Counter from './counter'

// 现在挂载组件,你便得到了这个包裹器
const wrapper = mount(Counter)

// 你可以通过 `wrapper.vm` 访问实际的 Vue 实例
const vm = wrapper.vm

// 在控制台将其记录下来即可深度审阅包裹器
// 我们对 Vue Test Utils 的探索也由此开始
console.log(wrapper)
只挂载不渲染
import { shallowMount } from '@vue/test-utils'

const wrapper = shallowMount(Component)
wrapper.vm // 挂载的 Vue 实例
测试渲染的html
import { mount } from '@vue/test-utils'
import Counter from './counter'

describe('Counter', () => {
  // 现在挂载组件,你便得到了这个包裹器
  const wrapper = mount(Counter)

  it('renders the correct markup', () => {
    expect(wrapper.html()).toContain('<span class="count">0</span>')
  })

  // 也便于检查已存在的元素
  it('has a button', () => {
    expect(wrapper.contains('button')).toBe(true)
  })
})
模拟用户操作
下面示例用来先定位按钮,再调用trigger模拟点击。
it('button click should increment the count', () => {
  expect(wrapper.vm.count).toBe(0)
  const button = wrapper.find('button')
  button.trigger('click')
  expect(wrapper.vm.count).toBe(1)
})
异步测试组件
it('button click should increment the count text', async () => {
  expect(wrapper.text()).toContain('0')
  const button = wrapper.find('button')
  await button.trigger('click')
  expect(wrapper.text()).toContain('1')
})


