阅读目录
- 简单介绍
- 章节1:Quartz简单实例
- 章节2:Job、JobDetail、JobBuilder
- 章节3:Trigger、TriggerBuilder
- 章节4:Scheduler
- 章节5:JobListener、SchedulerListener、TriggerListener
- 章节6:Cron表达式
- 章节7:程序示例
- 章节8:参考链接
简单介绍
在实际编程中,我们经常会遇到定时任务,或是隔一段时间执行指定任务,例如:
1. 在每月的30号9:00统计人员出勤情况;
2. 每隔10分钟执行一次入库操作;
上面的例子中,需要执行的操作就是Job(作业),而在指定时间或者间隔固定时间去触发这个Job的就是Trigger(触发器),而把二者联系在一起的就是Scheduler(调度器);
Quartz主要要理解三个方面:
- Scheduler:调度器,将Job和Trigger关联起来;
- Job :需要执行的作业;
- Trigger :触发器,指定执行的时间,主要包括两种方式:
<1>指定时间:如每月15号9:00,或者每天的12:00等等;
<2>间隔时间:如每隔10分钟执行一次,每隔2h执行一次等等;
回到顶部
一、Quartz简单实例
下面给出一个简单的示例:
SchedulerFactory schedFact = new org.quartz.impl.StdSchedulerFactory();
Scheduler sched = schedFact.getScheduler();
sched.start();
// define the job and tie it to our HelloJob class
JobDetail job = newJob(HelloJob.class)
.withIdentity("myJob", "group1")
.build();
// Trigger the job to run now, and then every 40 seconds
trigger = newTrigger()
.withIdentity("myTrigger", "group1")
.startNow()
.withSchedule(simpleSchedule()
.withIntervalInSeconds(40)
.repeatForever())
.build();
// Tell quartz to schedule the job using our trigger
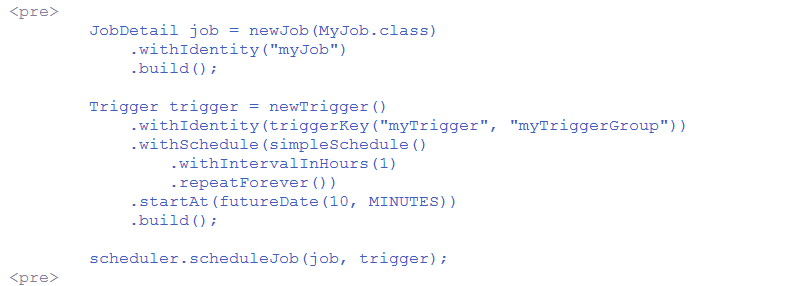
sched.scheduleJob(job, trigger);下面的截图是Java源码给出的示例:
我们在使用Quartz时,一般的操作步骤为:
步骤1:自定义Job类(如:MyJob),实现Job接口;
步骤2:使用JobBuilder生成JobDetail;
步骤3:定义Trigger类,一般使用TriggerBuilder生成;
步骤4:定义Scheduler类,使用Scheduler .scheduleJob(job, trigger)将job和trigger进行关联;
步骤5:Scheduler.start();
步骤6:当需要关闭Scheduler时,使用Scheduler.shutdown();
下面将具体进行讲解。
回到顶部
二、Job、JobDetail、JobBuilder
官方定义:
- Job - an interface to be implemented by components that you wish to have executed by the scheduler.
- JobDetail - used to define instances of Jobs.
- JobBuilder - used to define/build JobDetail instances, which define instances of Jobs.
Job
Job是一个接口类,下面是它的源码:

如果要实现自己的作业(任务),最简单的方式就是实现该接口,并实现接口中的execute()方法,当触发该作业时,就是执行execute()方法;
public class HelloJob implements Job {

    public HelloJob() {
    }

    public void execute(JobExecutionContext context)
      throws JobExecutionException
    {
      System.err.println("Hello!  HelloJob is executing.");
    }
  }
JobDetail
JobDetail :用于定义Job的实例,一般该类都是通过JobBuilder生成;
JobBuilder:用于定义或创建JobDetail实例,使用了建造者模式;
JobDetail job = newJob(HelloJob.class)
      .withIdentity("myJob", "group1") // name "myJob", group "group1"
      .build();
//带参数
JobDetail job = JobBuilder.newJob(clazz)
.withIdentity(new JobKey(jobName, groupName))
.usingJobData(new JobDataMap(params))
.build();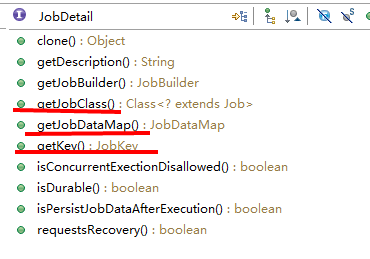
从上面的接口类中我们可以知道,只要有了JobDetail的实现类,我们就可以获取到:
- key;
- JobClass;
- JobDataMap;等
那我们在自定义的Job中怎么才能获取到JobDetail相关信息呢?

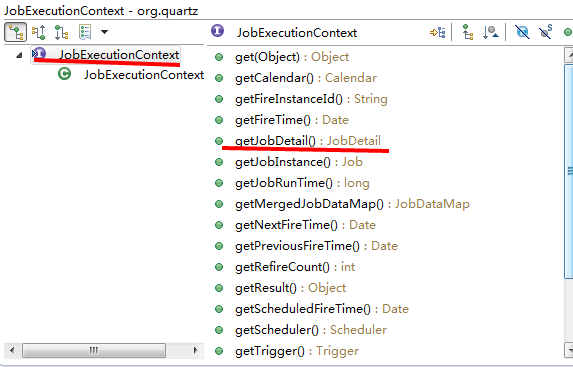
由上面可知,当自定义的作业被触发时,我们可以通过JobExecutionContext获取到JobDetail,进而获取JobDataMap、JobKey、JobClass等等信息;
JobBuilder
这里JobBuilder使用了建造者模式,下面对其源码进行解析;
对于建造者模式,这里不进行详述,首先看下它的字段:
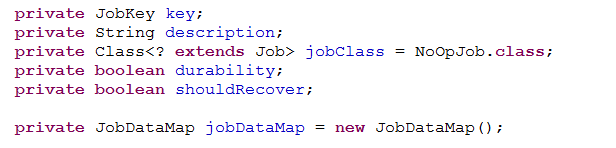
JobKey:作业的唯一标识,由name和group组成,如下:

jobClass:指定上述我们讲的自定义的Job(如:HelloJob );


JobDataMap:可以通过这个属性给自定义的Job(如:HelloJob)传递参数;
因为使用了建造者模式,所以实际创建的对象为:JobDetailImpl
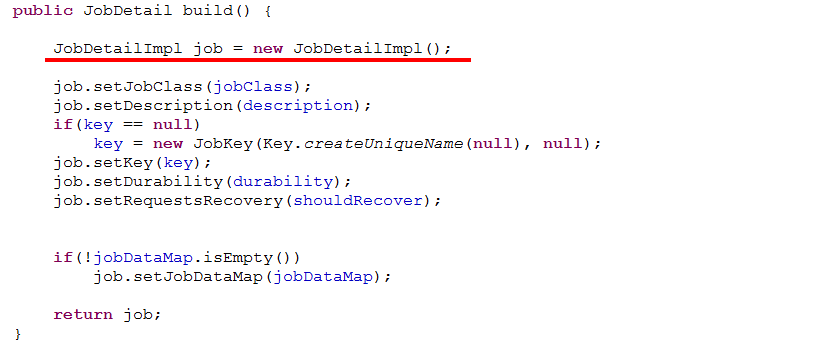
JobDetailImpl类实现了JobDeteil接口,如下:

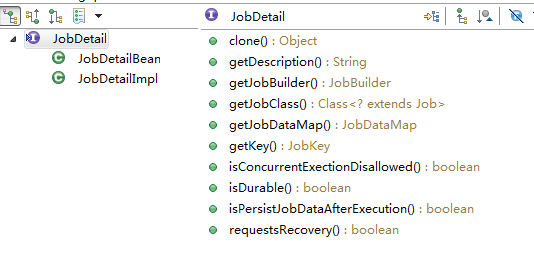
下图是类的层级结构图:
回到顶部
三、Trigger、TriggerBuilder
官方定义:
Trigger - a component that defines the schedule upon which a given Job will be executed.
TriggerBuilder - used to define/build Trigger instances.
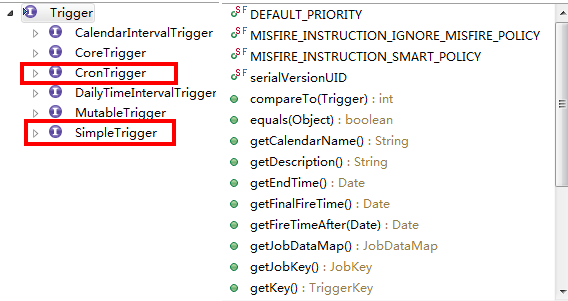
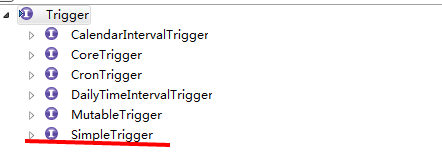
下面是触发器层次结构,常用的有SimpleTrigger、CronTrigger等;
SimpleTrigger

主要属性:

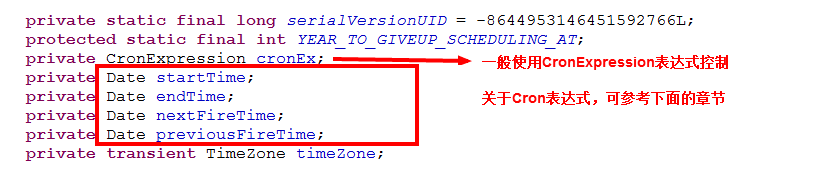
CronTrigger
使用CronTrigger可以进行很强大的控制,关于Cron表达式,下面的章节会介绍;
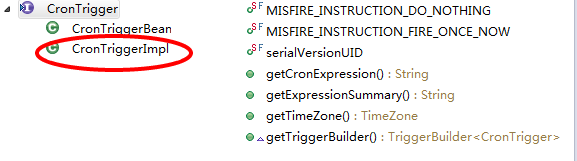

主要的参数:
TriggerBuilder
首先看下实现的例子:使用的也是建造者模式(建造者模式可自行搜索);
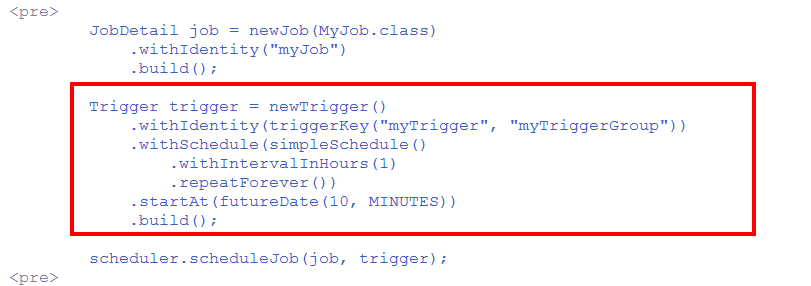
TriggerBuilder的属性如下:

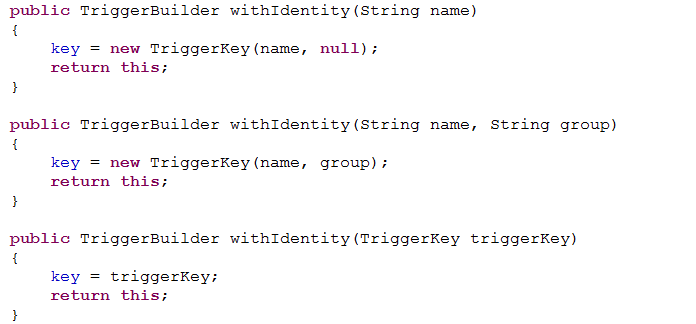
通过withIdentity()方法设定trigger唯一标识:
通过forJob()方法将Trigger和指定的Job绑定
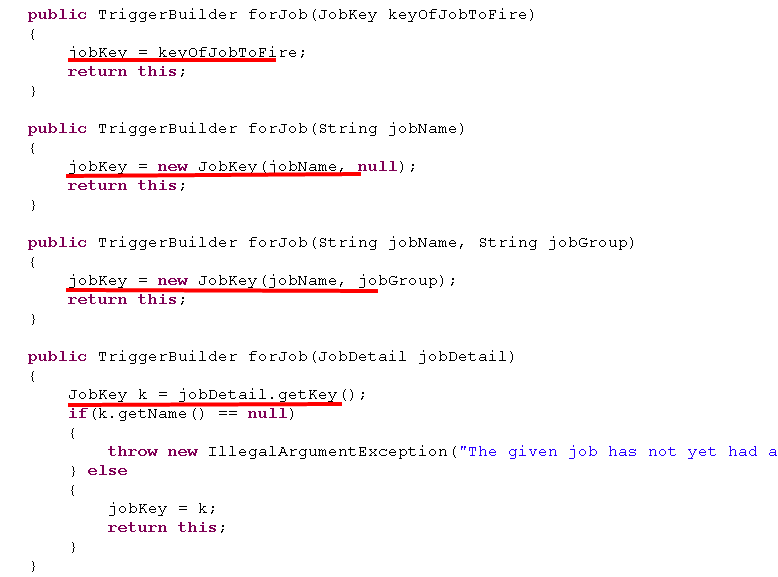
前面我们已经知道:
- 在使用JobBuilder创建JobDetail时,通过方法withIdentity()指定了JobDetail的JobKey;
- 这里通过TriggerBuilder的forJob()同样指定了JobKey;
==>只要上面两个JobKey设置的相同,则JobDetail和Trigger便绑定在一起了;
后面只需要使用Scheduler.scheduleJob(job,trigger)进行调度即可;
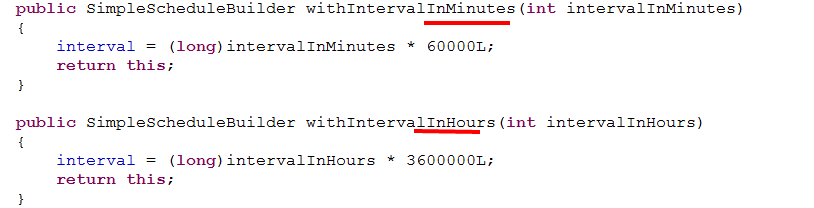
通过方法withSchedule设置调度器:

从上面可以看出,这个方法传递进去的实际上是一个调度器Scheduler的Builder,真正的调度器Scheduler还是需要通过ScheduleBuilder去创建,这里使用的还是建造者模式,从下面的层次可以看出,已经实现了4种ScheduleBuilder,这里以SimplesCheduleBuilder进行分析,其他类似

下面我们看看SimplesCheduleBuilder的源码实现;

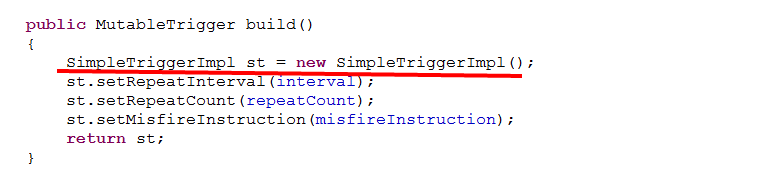
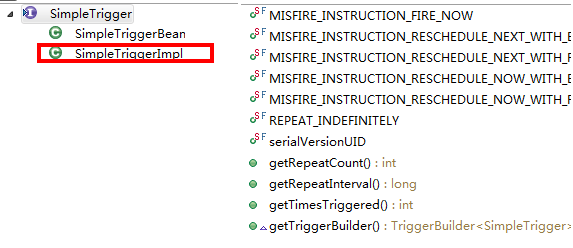
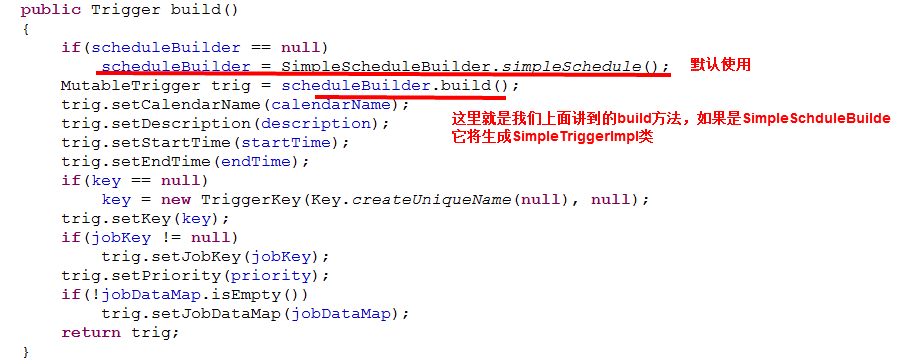
上面是build方法,可以看出,真正创建的是:SimpleTriggerImpl类,这个类在上面已经介绍过,它是Trigger的一个实现类;
我们接着看TriggerBuilder的build方法:
回到顶部
四、Scheduler
官方定义:
Scheduler - the main API for interacting with the scheduler.
与调度程序交互的主要API。
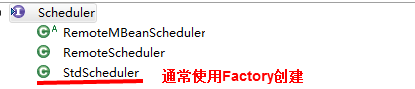
具体实现类:
主要的方法:
说明:
只有在scheduler.start();之后,trigger以及Job才能有效运行;
shutdown用于关闭;
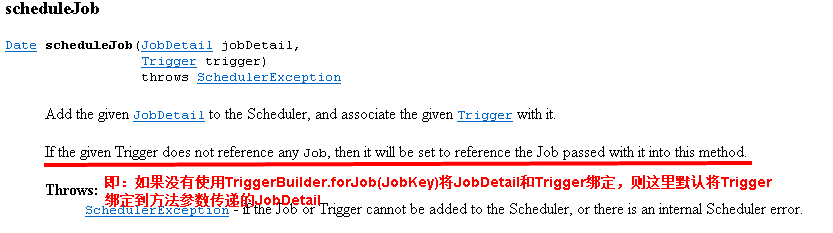
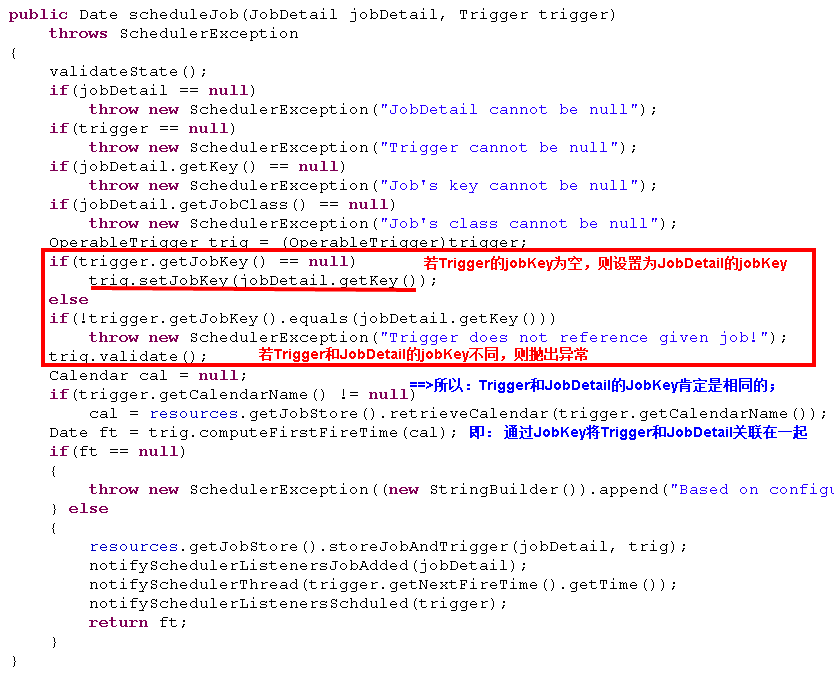
schedeleJob方法介绍
// Tell quartz to schedule the job using our trigger
  sched.scheduleJob(job, trigger);
官方介绍如下:
现在以StdScheduler作为示例进行介绍:
start()方法介绍
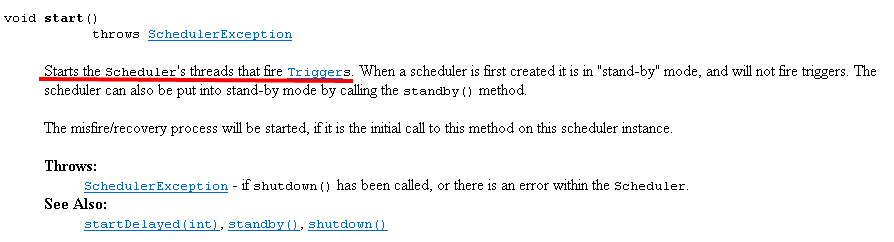
使用start()方法来激活Trigger,执行定时任务;
回到顶部
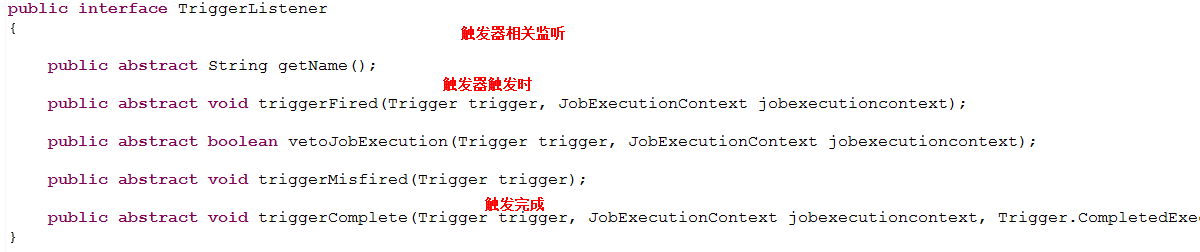
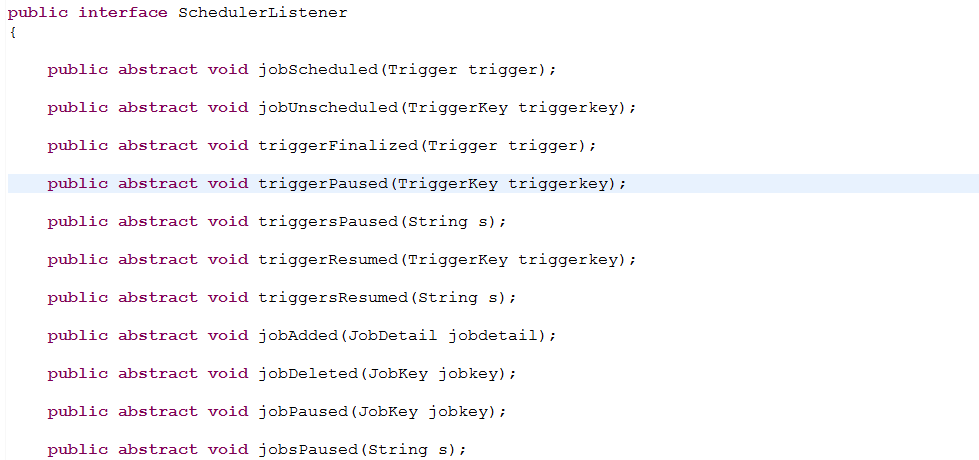
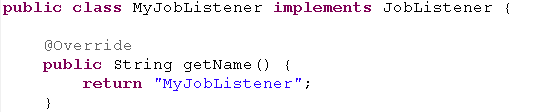
五、JobListener、SchedulerListener、TriggerListener

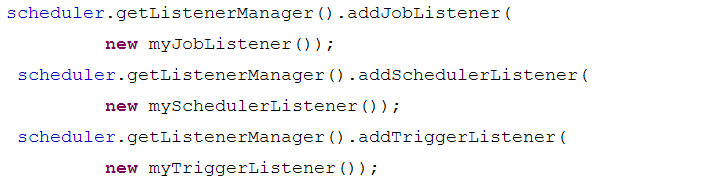
对监听进行注册:
回到顶部
六、Cron表达式
语法格式:

示例:


- * ("all values") - used to select all values within a field. For example, "" in the minute field means *"every minute".
- ? ("no specific value") - useful when you need to specify something in one of the two fields in which the character is allowed, but not the other. For example, if I want my trigger to fire on a particular day of the month (say, the 10th), but don't care what day of the week that happens to be, I would put "10" in the day-of-month field, and "?" in the day-of-week field. See the examples below for clarification.
- - - used to specify ranges. For example, "10-12" in the hour field means "the hours 10, 11 and 12".
- , - used to specify additional values. For example, "MON,WED,FRI" in the day-of-week field means "the days Monday, Wednesday, and Friday".
- / - used to specify increments. For example, "0/15" in the seconds field means "the seconds 0, 15, 30, and 45". And "5/15" in the seconds field means "the seconds 5, 20, 35, and 50". You can also specify '/' after the '' character - in this case '' is equivalent to having '0' before the '/'. '1/3' in the day-of-month field means "fire every 3 days starting on the first day of the month".
- L ("last") - has different meaning in each of the two fields in which it is allowed. For example, the value "L" in the day-of-month field means "the last day of the month" - day 31 for January, day 28 for February on non-leap years. If used in the day-of-week field by itself, it simply means "7" or "SAT". But if used in the day-of-week field after another value, it means "the last xxx day of the month" - for example "6L" means "the last friday of the month". You can also specify an offset from the last day of the month, such as "L-3" which would mean the third-to-last day of the calendar month. When using the 'L' option, it is important not to specify lists, or ranges of values, as you'll get confusing/unexpected results.
- W ("weekday") - used to specify the weekday (Monday-Friday) nearest the given day. As an example, if you were to specify "15W" as the value for the day-of-month field, the meaning is: "the nearest weekday to the 15th of the month". So if the 15th is a Saturday, the trigger will fire on Friday the 14th. If the 15th is a Sunday, the trigger will fire on Monday the 16th. If the 15th is a Tuesday, then it will fire on Tuesday the 15th. However if you specify "1W" as the value for day-of-month, and the 1st is a Saturday, the trigger will fire on Monday the 3rd, as it will not 'jump' over the boundary of a month's days. The 'W' character can only be specified when the day-of-month is a single day, not a range or list of days.
The 'L' and 'W' characters can also be combined in the day-of-month field to yield 'LW', which translates to *"last weekday of the month"*.
- #- used to specify "the nth" XXX day of the month. For example, the value of "6#3" in the day-of-week field means"the third Friday of the month"(day 6 = Friday and "#3" = the 3rd one in the month). Other examples: "2#1" = the first Monday of the month and "4#5" = the fifth Wednesday of the month. Note that if you specify "#5" and there is not 5 of the given day-of-week in the month, then no firing will occur that month.
回到顶部
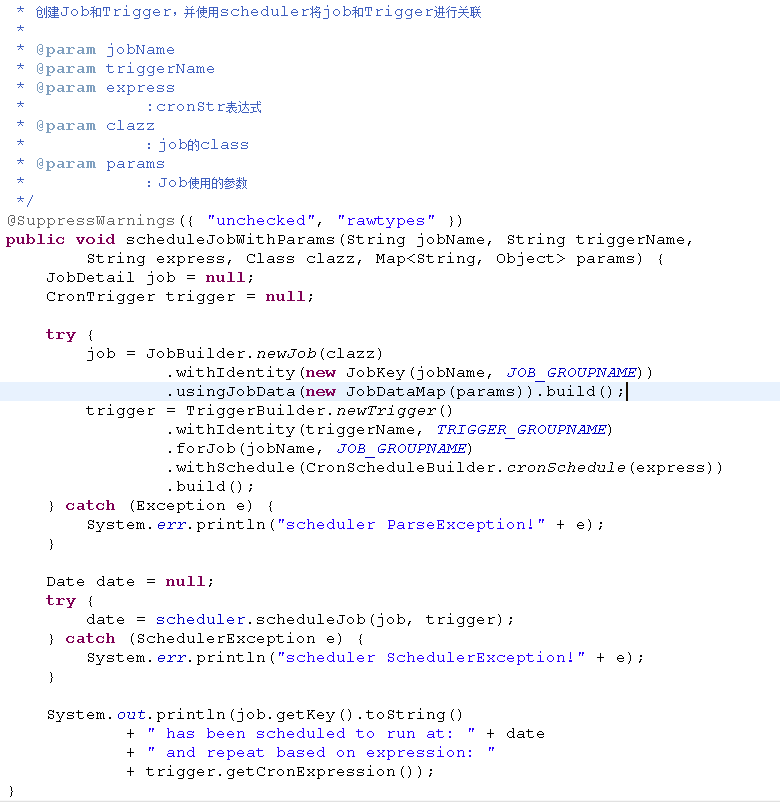
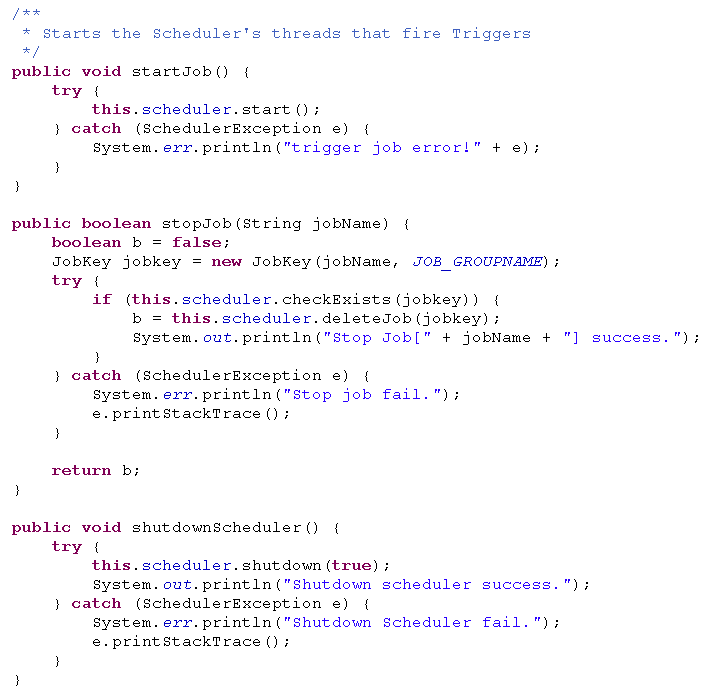
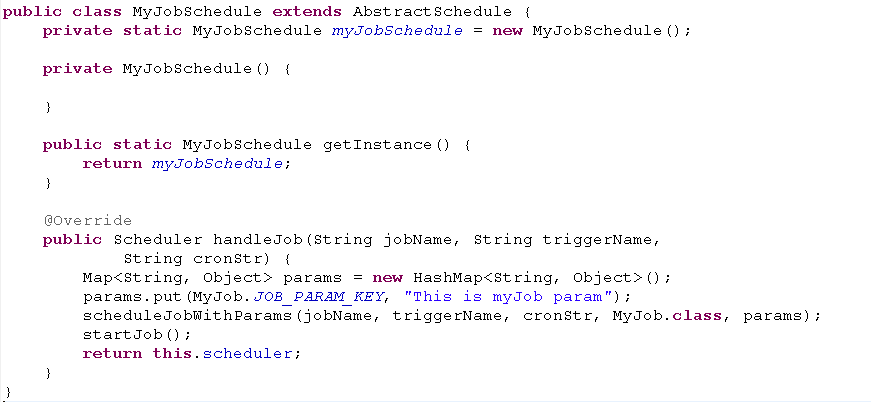
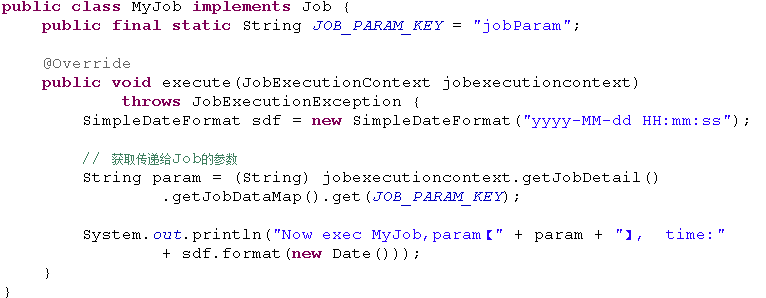
七、程序示例
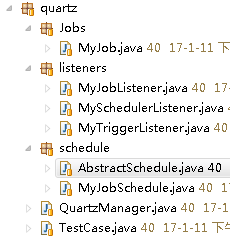
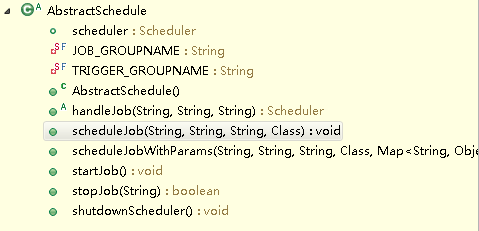
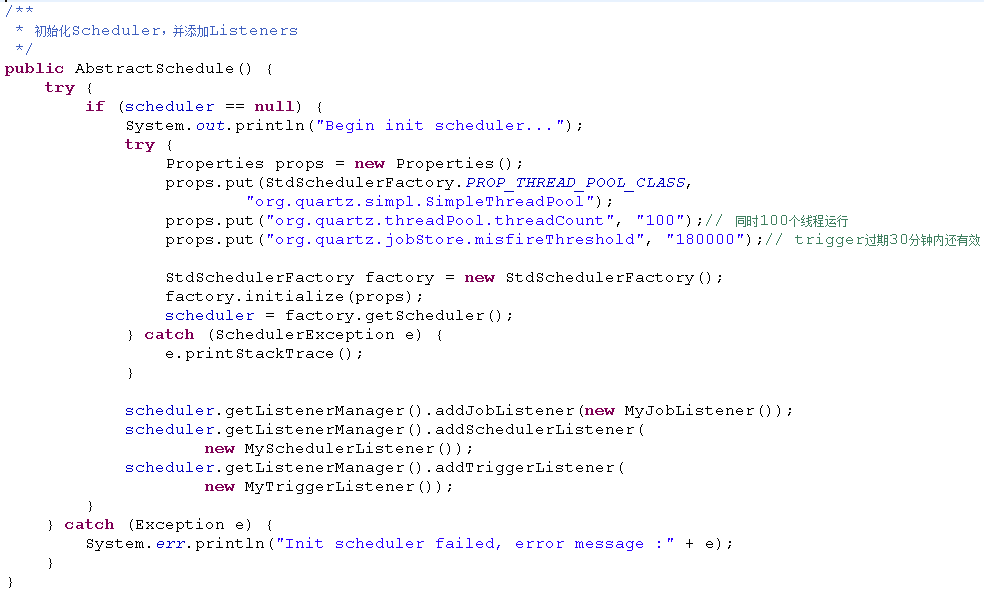
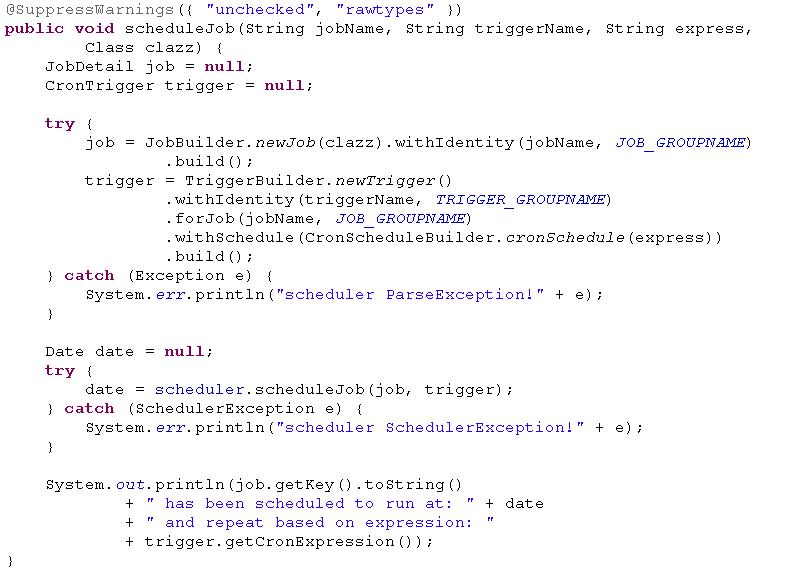
AbstractSchedule类:抽象基类
MyJobSchedule.java
MyJob.java
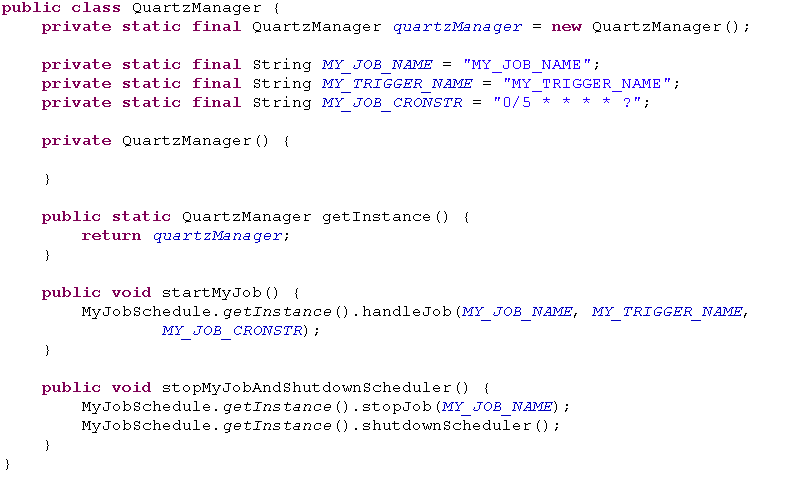
QuartzManager.java


TestCase.java


八、参考链接
http://www.quartz-scheduler.org/
http://www.quartz-scheduler.org/documentation/quartz-2.1.x/tutorials/crontrigger


