
个人名片:
文章目录
8. 加入购物车
8.0 创建 cart 分支
运行如下的命令,基于 master 分支在本地创建 cart 子分支,用来开发购物车相关的功能:
git checkout -b cart
8.1 配置 vuex
-
在项目根目录中创建
store文件夹,专门用来存放vuex相关的模块 -
在
store目录上鼠标右键,选择新建->js文件,新建store.js文件:
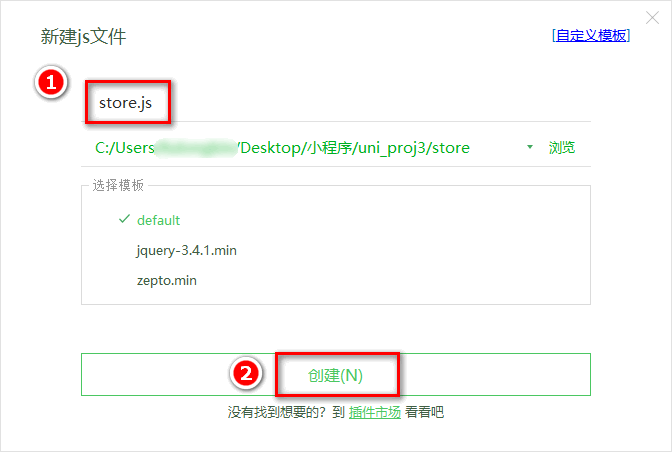
- 在
store.js中按照如下 4 个步骤初始化Store的实例对象:
// 1. 导入 Vue 和 Vuex
import Vue from 'vue'
import Vuex from 'vuex'

// 2. 将 Vuex 安装为 Vue 的插件
Vue.use(Vuex)

// 3. 创建 Store 的实例对象
const store = new Vuex.Store({
  // TODO:挂载 store 模块
  modules: {},
})

// 4. 向外共享 Store 的实例对象
export default store
- 在
main.js中导入store实例对象并挂载到Vue的实例上:
// 1. 导入 store 的实例对象
import store from './store/store.js'

// 省略其它代码...

const app = new Vue({
  ...App,
  // 2. 将 store 挂载到 Vue 实例上
  store,
})
app.$mount()
8.2 创建购物车的 store 模块
- 在
store目录上鼠标右键,选择新建->js文件,创建购物车的store模块,命名为cart.js:
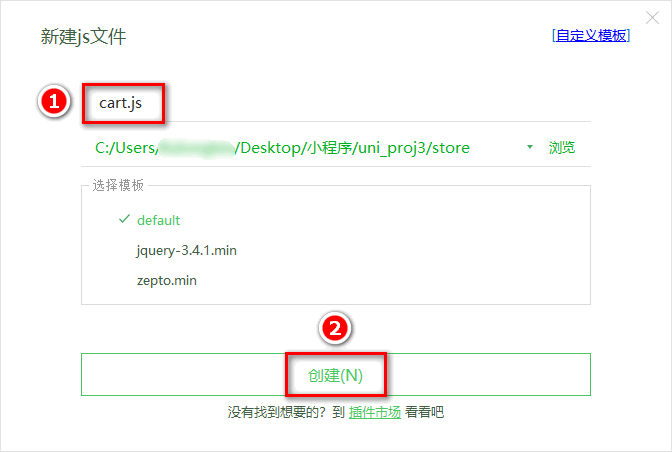
- 在
cart.js中,初始化如下的vuex模块:
export default {
  // 为当前模块开启命名空间
  namespaced: true,

  // 模块的 state 数据
  state: () => ({
    // 购物车的数组,用来存储购物车中每个商品的信息对象
    // 每个商品的信息对象,都包含如下 6 个属性:
    // { goods_id, goods_name, goods_price, goods_count, goods_small_logo, goods_state }
    cart: [],
  }),

  // 模块的 mutations 方法
  mutations: {},

  // 模块的 getters 属性
  getters: {},
}
- 在
store/store.js模块中,导入并挂载购物车的vuex模块,示例代码如下:
import Vue from 'vue'
import Vuex from 'vuex'
// 1. 导入购物车的 vuex 模块
import moduleCart from './cart.js'

Vue.use(Vuex)

const store = new Vuex.Store({
  // TODO:挂载 store 模块
  modules: {
    // 2. 挂载购物车的 vuex 模块,模块内成员的访问路径被调整为 m_cart,例如:
    //    购物车模块中 cart 数组的访问路径是 m_cart/cart
    m_cart: moduleCart,
  },
})

export default store
8.3 在商品详情页中使用 Store 中的数据
- 在
goods_detail.vue页面中,修改<script></script>标签中的代码如下:
// 从 vuex 中按需导出 mapState 辅助方法
import { mapState } from 'vuex'

export default {
  computed: {
    // 调用 mapState 方法,把 m_cart 模块中的 cart 数组映射到当前页面中,作为计算属性来使用
    // ...mapState('模块的名称', ['要映射的数据名称1', '要映射的数据名称2'])
    ...mapState('m_cart', ['cart']),
  },
  // 省略其它代码...
}
注意:今后无论映射 mutations 方法,还是 getters 属性,还是 state 中的数据,都需要指定模块的名称,才能进行映射。
- 在页面渲染时,可以直接使用映射过来的数据,例如:
<!-- 运费 -->
<view class="yf">快递:免运费 -- {{cart.length}}</view>
8.4 实现加入购物车的功能
- 在
store目录下的cart.js模块中,封装一个将商品信息加入购物车的mutations方法,命名为addToCart。示例代码如下:
export default {
  // 为当前模块开启命名空间
  namespaced: true,

  // 模块的 state 数据
  state: () => ({
    // 购物车的数组,用来存储购物车中每个商品的信息对象
    // 每个商品的信息对象,都包含如下 6 个属性:
    // { goods_id, goods_name, goods_price, goods_count, goods_small_logo, goods_state }
    cart: [],
  }),

  // 模块的 mutations 方法
  mutations: {
    addToCart(state, goods) {
      // 根据提交的商品的Id,查询购物车中是否存在这件商品
      // 如果不存在,则 findResult 为 undefined;否则,为查找到的商品信息对象
      const findResult = state.cart.find((x) => x.goods_id === goods.goods_id)

      if (!findResult) {
        // 如果购物车中没有这件商品,则直接 push
        state.cart.push(goods)
      } else {
        // 如果购物车中有这件商品,则只更新数量即可
        findResult.goods_count++
      }
    },
  },

  // 模块的 getters 属性
  getters: {},
  }
- 在商品详情页面中,通过
mapMutations这个辅助方法,把 vuex 中 m_cart 模块下的 addToCart 方法映射到当前页面:
// 按需导入 mapMutations 这个辅助方法
import { mapMutations } from 'vuex'

export default {
  methods: {
    // 把 m_cart 模块中的 addToCart 方法映射到当前页面使用
    ...mapMutations('m_cart', ['addToCart']),
  },
}
- 为商品导航组件
uni-goods-nav绑定@buttonClick="buttonClick"事件处理函数:
// 右侧按钮的点击事件处理函数
buttonClick(e) {
   // 1. 判断是否点击了 加入购物车 按钮
   if (e.content.text === '加入购物车') {

      // 2. 组织一个商品的信息对象
      const goods = {
         goods_id: this.goods_info.goods_id,       // 商品的Id
         goods_name: this.goods_info.goods_name,   // 商品的名称
         goods_price: this.goods_info.goods_price, // 商品的价格
         goods_count: 1,                           // 商品的数量
         goods_small_logo: this.goods_info.goods_small_logo, // 商品的图片
         goods_state: true                         // 商品的勾选状态
      }

      // 3. 通过 this 调用映射过来的 addToCart 方法,把商品信息对象存储到购物车中
      this.addToCart(goods)

   }
}
8.5 动态统计购物车中商品的总数量
- 在
cart.js模块中,在getters节点下定义一个total方法,用来统计购物车中商品的总数量:
// 模块的 getters 属性
getters: {
   // 统计购物车中商品的总数量
   total(state) {
      let c = 0
      // 循环统计商品的数量,累加到变量 c 中
      state.cart.forEach(goods => c += goods.goods_count)
      return c
   }
}
- 在商品详情页面的
script标签中,按需导入mapGetters方法并进行使用:
// 按需导入 mapGetters 这个辅助方法
import { mapGetters } from 'vuex'

export default {
  computed: {
    // 把 m_cart 模块中名称为 total 的 getter 映射到当前页面中使用
    ...mapGetters('m_cart', ['total']),
  },
}
- 通过
watch侦听器,监听计算属性total值的变化,从而动态为购物车按钮的徽标赋值:
export default {
  watch: {
    // 1. 监听 total 值的变化,通过第一个形参得到变化后的新值
    total(newVal) {
      // 2. 通过数组的 find() 方法,找到购物车按钮的配置对象
      const findResult = this.options.find((x) => x.text === '购物车')

      if (findResult) {
        // 3. 动态为购物车按钮的 info 属性赋值
        findResult.info = newVal
      }
    },
  },
}
8.6 持久化存储购物车中的商品
- 在
cart.js模块中,声明一个叫做saveToStorage的mutations方法,此方法负责将购物车中的数据持久化存储到本地:
// 将购物车中的数据持久化存储到本地
saveToStorage(state) {
   uni.setStorageSync('cart', JSON.stringify(state.cart))
}
- 修改
mutations节点中的addToCart方法,在处理完商品信息后,调用步骤 1 中定义的saveToStorage方法:
addToCart(state, goods) {
   // 根据提交的商品的Id,查询购物车中是否存在这件商品
   // 如果不存在,则 findResult 为 undefined;否则,为查找到的商品信息对象
   const findResult = state.cart.find(x => x.goods_id === goods.goods_id)

   if (!findResult) {
      // 如果购物车中没有这件商品,则直接 push
      state.cart.push(goods)
   } else {
      // 如果购物车中有这件商品,则只更新数量即可
      findResult.goods_count++
   }

   // 通过 commit 方法,调用 m_cart 命名空间下的 saveToStorage 方法
   this.commit('m_cart/saveToStorage')
}
- 修改
cart.js模块中的state函数,读取本地存储的购物车数据,对cart数组进行初始化:
// 模块的 state 数据
state: () => ({
   // 购物车的数组,用来存储购物车中每个商品的信息对象
   // 每个商品的信息对象,都包含如下 6 个属性:
   // { goods_id, goods_name, goods_price, goods_count, goods_small_logo, goods_state }
   cart: JSON.parse(uni.getStorageSync('cart') || '[]')
}),
8.7 优化商品详情页的 total 侦听器
- 使用普通函数的形式定义的
watch侦听器,在页面首次加载后不会被调用。因此导致了商品详情页在首次加载完毕之后,不会将商品的总数量显示到商品导航区域:
watch: {
   // 页面首次加载完毕后,不会调用这个侦听器
   total(newVal) {
      const findResult = this.options.find(x => x.text === '购物车')
      if (findResult) {
         findResult.info = newVal
      }
   }
}
- 为了防止这个上述问题,可以使用对象的形式来定义
watch侦听器(详细文档请参考Vue官方的watch侦听器教程),示例代码如下:
watch: {
   // 定义 total 侦听器,指向一个配置对象
   total: {
      // handler 属性用来定义侦听器的 function 处理函数
      handler(newVal) {
         const findResult = this.options.find(x => x.text === '购物车')
         if (findResult) {
            findResult.info = newVal
         }
      },
      // immediate 属性用来声明此侦听器,是否在页面初次加载完毕后立即调用
      immediate: true
   }
}
8.8 动态为 tabBar 页面设置数字徽标
需求描述:从商品详情页面导航到购物车页面之后,需要为 tabBar 中的购物车动态设置数字徽标。
- 把
Store中的total映射到cart.vue中使用:
// 按需导入 mapGetters 这个辅助方法
import { mapGetters } from 'vuex'

export default {
  data() {
    return {}
  },
  computed: {
    // 将 m_cart 模块中的 total 映射为当前页面的计算属性
    ...mapGetters('m_cart', ['total']),
  },
}
- 在页面刚显示出来的时候,立即调用
setBadge方法,为tabBar设置数字徽标:
onShow() {
   // 在页面刚展示的时候,设置数字徽标
   this.setBadge()
}
- 在
methods节点中,声明setBadge方法如下,通过uni.setTabBarBadge()为tabBar设置数字徽标:
methods: {
   setBadge() {
      // 调用 uni.setTabBarBadge() 方法,为购物车设置右上角的徽标
      uni.setTabBarBadge({
         index: 2, // 索引
         text: this.total + '' // 注意:text 的值必须是字符串,不能是数字
      })
   }
}
8.9 将设置 tabBar 徽标的代码抽离为 mixins
注意:除了要在 cart.vue 页面中设置购物车的数字徽标,还需要在其它 3 个 tabBar 页面中,为购物车设置数字徽标。
此时可以使用 Vue 提供的 mixins 特性,提高代码的可维护性。
- 在项目根目录中新建
mixins文件夹,并在mixins文件夹之下新建tabbar-badge.js文件,用来把设置tabBar徽标的代码封装为一个mixin文件:
import { mapGetters } from 'vuex'

// 导出一个 mixin 对象
export default {
  computed: {
    ...mapGetters('m_cart', ['total']),
  },
  onShow() {
    // 在页面刚展示的时候,设置数字徽标
    this.setBadge()
  },
  methods: {
    setBadge() {
      // 调用 uni.setTabBarBadge() 方法,为购物车设置右上角的徽标
      uni.setTabBarBadge({
        index: 2,
        text: this.total + '', // 注意:text 的值必须是字符串,不能是数字
      })
    },
  },
}
- 修改
home.vue,cate.vue,cart.vue,my.vue这 4 个tabBar页面的源代码,分别导入@/mixins/tabbar-badge.js模块并进行使用:
// 导入自己封装的 mixin 模块
import badgeMix from '@/mixins/tabbar-badge.js'

export default {
  // 将 badgeMix 混入到当前的页面中进行使用
  mixins: [badgeMix],
  // 省略其它代码...
}


